2004 -> 2007 STi and WRXIf you want to buy the whole PS pump assembly it's about $500 or more from the dealer:
1x PN:
34430FE042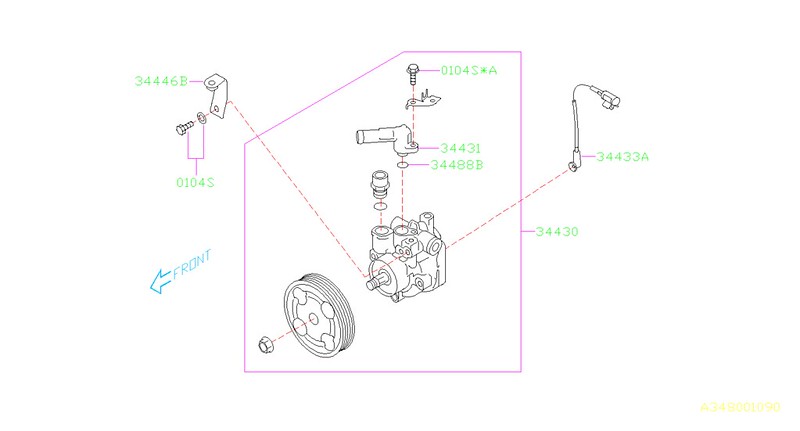 34430FE042 fitment
 ... According to Subaru this pump is good for 3 models, 86 variants (apparently, also includes 2005/2006 Saab 9-2X Aero)
I've only rebuilt two models of this pump; one being my own 2005 WRX and the others belonging to 2007 STi's. I can confirm that the WRX/STi pumps are NOT identical but the difference only seems to be internals. Additionally, some have metal suction elbows and some have plastic, which is no big deal if you're rebuilding your pump.
I'm based in Calgary and my parts suppliers have shops in both Calgary and Edmonton. I'll provide you with enough information so that you can source your own parts from anywhere you choose if you're not from either location. Prices are current at December 2015.
Tools:Shop vice (with soft jaws).
Not essential, but pretty useful when it comes to breaking the pump apart. I've done a pump without a vise but it was challenging. Soft jaws are helpful for clamping force and protecting the internal pump surfaces.Impact gun.
I used both an 18V impact for the easy stuff and a Mastercraft 110V model when the going got tough pulling stuff off the pump (yes, it gets really tough if you don't have a vise or a second set of hands).3/8" drive ratchet
3/8" drive extension bars, one around 2" long and one around 6" long.
1/2" drive ratchet
for the larger sockets10mm socket
12mm socket.
Some suggest using a 12mm swivel socket on the (nearly hidden) back bolt of the pump bracket but I've seen it done without.14mm socket
17mm socket
19mm socket
21mm or 22m socket
to remove the high pressure standoff (need confirmation here, 21mm or 22mm)Large pliers or multi grip pliers
to remove the Subaru spring hose clampsReasonably hard rubber mallet or blocks of wood to hit with a mallet/hammer during disassembly.
Small/medium sized screwdriver
for separating electrical connectors and tapping out the pump shaft oil seal.Large sized screwdriver
assisting pulley removal and levering the pump from its mount.Pick set
or something with a fine tip to help you remove o-ringsDegreaser
and some scrubbing brushes if you pump is really dirtyBrake cleaner
Cheap turkey baster
(~$2 at Canadian Tire)Parts:Dexron III ATF fluid. Grab at least one bottle to top up the reservoir as you're going to lose the volume in the pump as well as some of what's in the hoses. Now is the time to perform a full fluid flush so why not grab three? NAPA sells this stuff for about $7 a litre and you can always return unopened bottles if you don't use them.
CONFIRMED Parts List for 2007 STi PS pump rebuild:- Nitrile o-rings from Hi-Tech Seals:
1x PN: N70 013 (~$0.80)
4x PN: N70 014 (~$0.80ea)
1x PN: N70 015 (~$0.80)
1x PN: N70 017 (~$0.80)
1x PN: N70 037 (~$2.00)
1x PN: N70 119 (~$0.80)
1x PN: N70 136 (~$1.50) - 1x PN: OS 20-32-7DL (~$10.00) ... Oil bearing shaft seal from Hi-Tech Seals
- 1x PN: BCPBB6203 2RS (~$3.00) ... Shaft bearing from Casterland
- 1x PN: 34621AC024 ... Subaru banjo bolt copper washer (not essential, but consider it good practice to install a fresh one)
CONFIRMED Parts List for 2005 WRX PS pump rebuild:- Nitrile o-rings from Hi-Tech Seals:
1x PN: N70 013 (~$0.80)
3x PN: N70 014 (~$0.80ea) ... do yourself a favour and buy four (4) just in case
1x PN: N70 015 (~$0.80)
1x PN: N70 017 (~$0.80)
1x PN: N70 037 (~$2.00)
1x PN: N70 119 (~$0.80)
1x PN: N70 136 (~$1.50) - 1x PN: OS 20-32-7DL (~$10.00) ... Oil bearing shaft seal from Hi-Tech Seals
- 1x PN: BCPBB6203 2RS (~$3.00) ... Shaft bearing from Casterland
- 1x PN: 34621AC024 ... Subaru banjo bolt copper washer (not essential, but consider it good practice to install a fresh one)
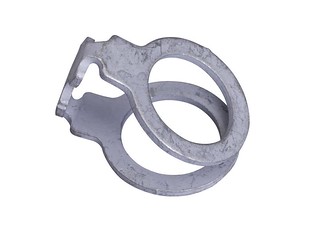
34621AC024 image:
--------------------------------
Following process will help you remove your PS pump:You DO NOT need to disconnect the coolant hoses to gain access to remove the PS pump. However, it helps if the car has cooled off some as you'll need to rest skin against the radiator hose to get to some of the bolts. Access is tight but not impossible unless you have massive arms/hands. I'm going to assume you have
some mechanical knowledge but I'll provide you with enough detail so that you're not afraid to attempt this yourself if you're on the fence. The entire process should take roughly 3 hours from start to finish (hood up to hood down) if you're competent, longer if you're cautious and nervous, even longer if your pump is disgustingly caked in an oily/dusty slurry.
1) Remove the belt cover by removing 10mm nut and bolt on the two sides.
2) On the WRX; if yours are still connected (mine broke years ago) pop off the plastic cable clips from the cover so that you can move the cover out of the way (... not a problem if you're working on the STi).
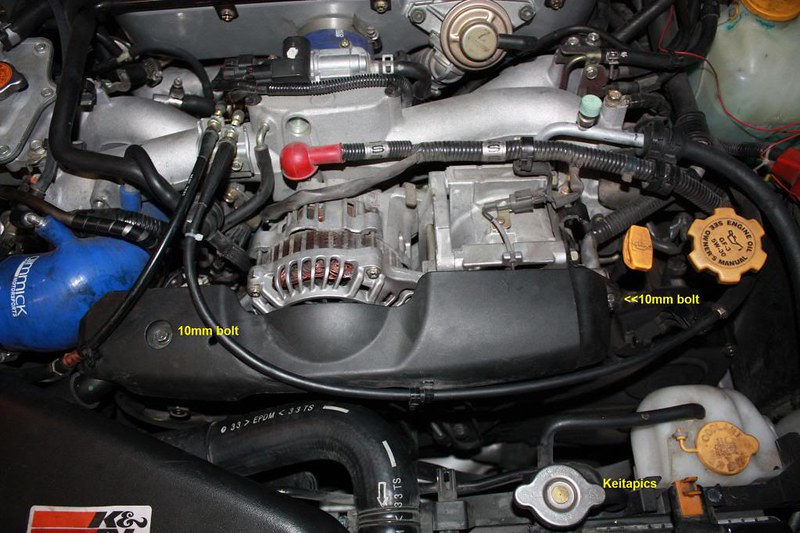
(Photo by keita, Scoobymods)
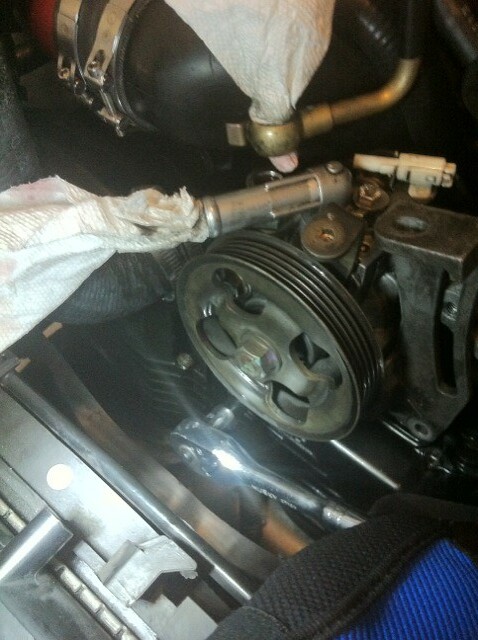
3) Have paper towels handy and surrounding the hose before you start this next step. Remove the clamp (spring clamp, if you're stock) from the power steering pump suction connection and plug the hose and suction elbow openings with paper towel.

(Photo by maxxell, iWSTi)
4) Again, have paper towels handy. Remove the 14mm banjo bolt on the discharge (high pressure) side of the power steering pump. Be mindful of the u-shaped copper washer that surrounds the banjo. You can re-use this but I've already mentioned that it's good practice to change this while you have the HP connection opened up.
(Photo by maxxell, iWSTi)
5) Plug the connection with paper towel. It also helps to plug the opening in the pump discharge nozzle standoff as oil will pour out when you eventually remove the pump and you start turning it over to inspect it.
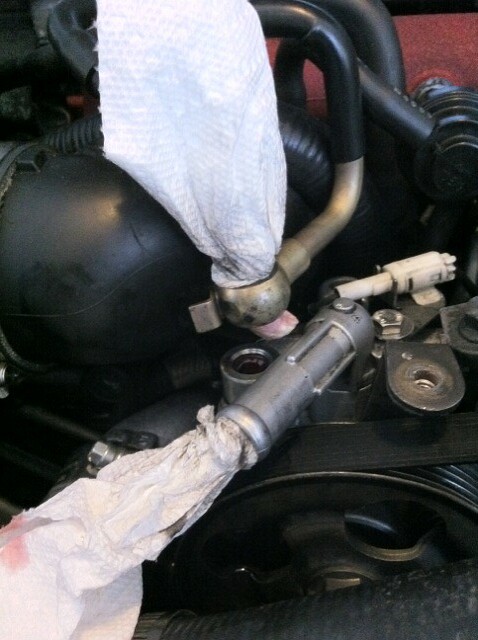
(Photo by maxxell, iWSTi)
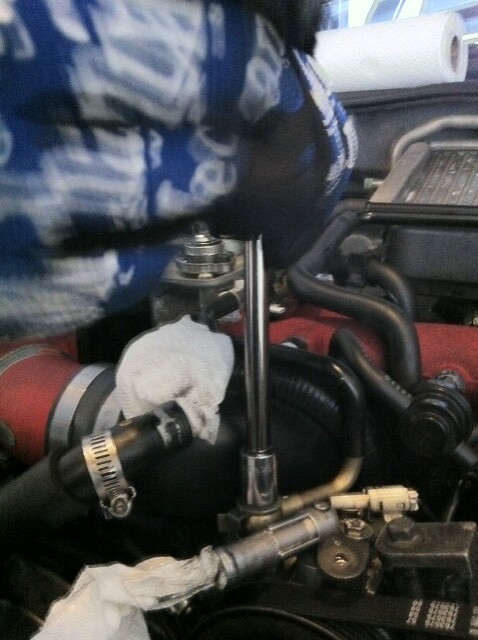
6) Now you have to lower the alternator to loosen the accessory belt. First, loosen this 12mm bolt.
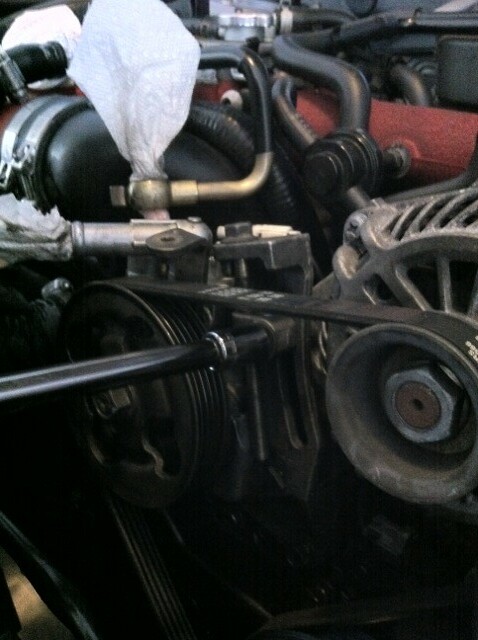
(Photo by maxxell, iWSTi)
7) To lower the alternator, loosen this 12mm bolt. The bolt is going to ride up, so give the alternator a push and it will drop enough to remove the belt. Don't let the alternator sag unnecessarily against the AC belt.

(Photo by maxxell, iWSTi)
8 ) Remove the 12mm bolt holding the alternator belt tensioner clamp and remove the long 12mm alternator tensioner bolt.
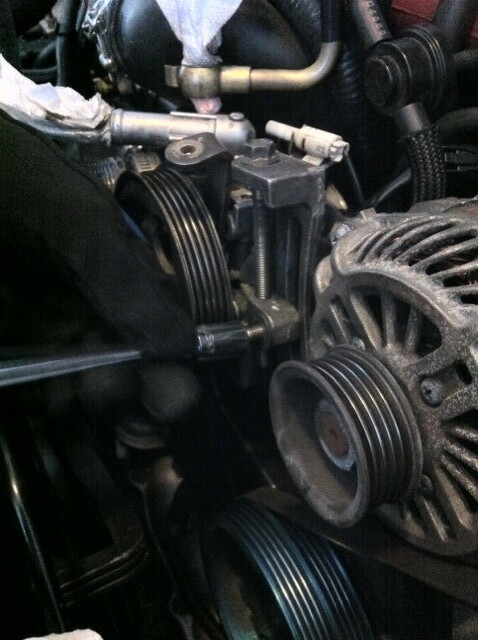
(Photo by maxxell, iWSTi)
9) Remove the 12mm mounting bolt below the tensioner bracket.
(Photo by maxxell, iWSTi)
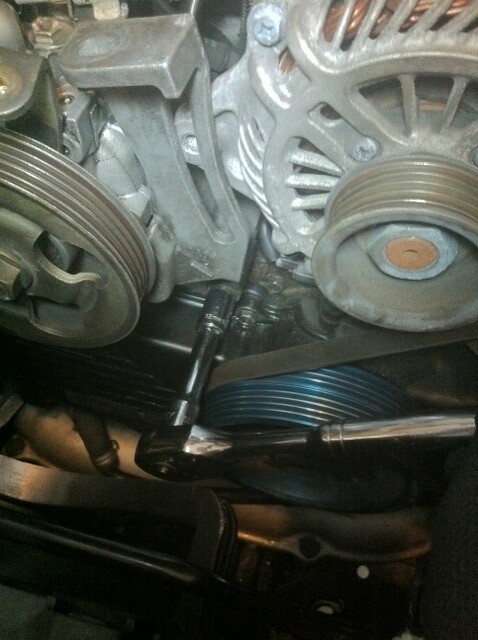
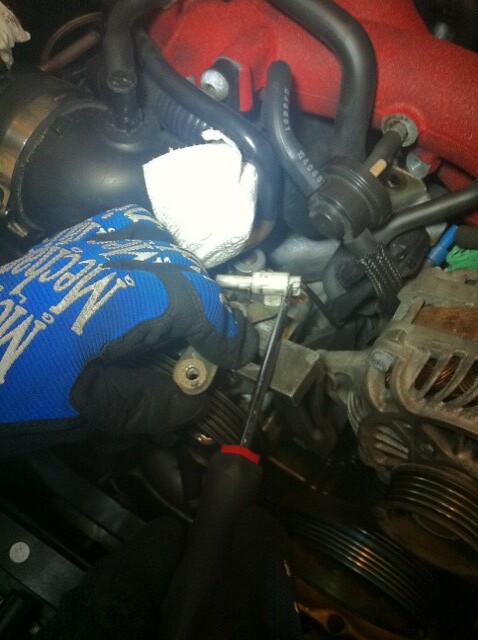
10) Remove the 12mm mounting bolt on the lower left of the pump. This one is hard to see if you left the radiator hose in place and can be tough to reach.
(Photo by maxxell, iWSTi)
You can ignore the "clearing space" instructions in steps 11) and 12) if you have a 12mm swivel socket and a 6" extension.11) There's one last 12mm bolt holding the PS pump to the engine. It's tucked away at the back of the pump. To get to it you're going to need to clear a little bit of space. I'm typing this DIY without an engine in front of me and it's been a while since I did this personally, so I'm going to borrow even more heavily from
maxxell here. Let's start with more pictures. On the 07 STi you're going to see something like the below image. Remove these vaccuum lines. Pay attention to both the big black circle piece and the distant blue end.
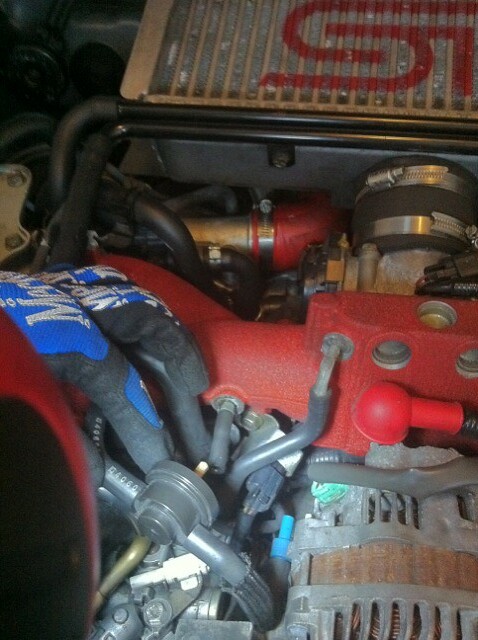
(Photo by maxxell, iWSTi)
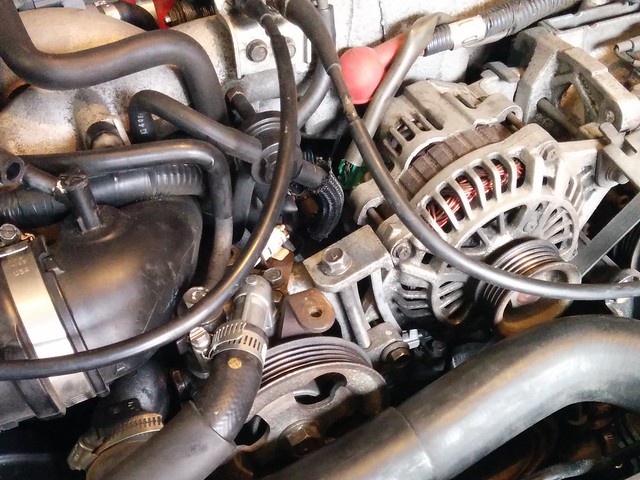
On the 05 WRX it looks more like the below image. Same as the STi, you'll need to pull this stuff out of the way if you're not using that swivel socket.
12) On both the STi and WRX; remove this 12mm bolt to get some slack on the electrical connection (evap solenoid?). We're working ourselves a path to the next bolt, down below. This next bolt is way down there and you dont wanna muck up your electric connections.
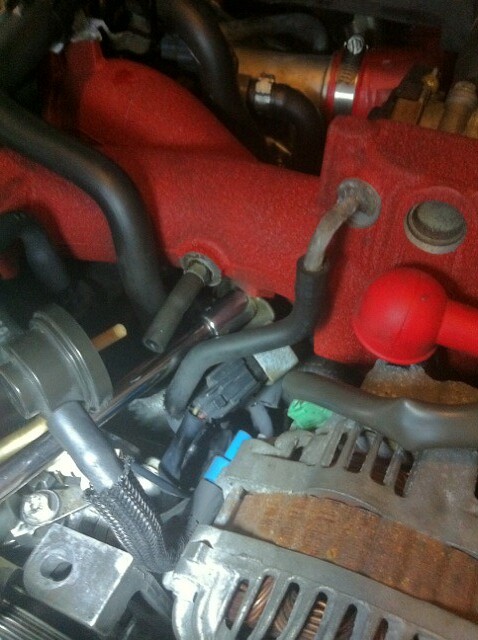
(Photo by maxxell, iWSTi)
13) Now's a good time to disconnect the temperature sensor line.
(Photo by maxxell, iWSTi)
14) The final 12mm mounting bolt (as mentioned in step 11) is down behind the power steering pump. You'll need a decent ratchet extender to reach it. One last time; that swivel socket also helps if you wish to avoid pulling the peripheral vacuum lines and electrical fittings for space. I've seen this bolt removed using either method with both being just as effective. Play it safe, make space and don't break anything. Congratulations, after removing this bolt you should now be holding your PS pump in your hands and you're clear of the engine bay for the time being.

(Photo by maxxell, iWSTi)
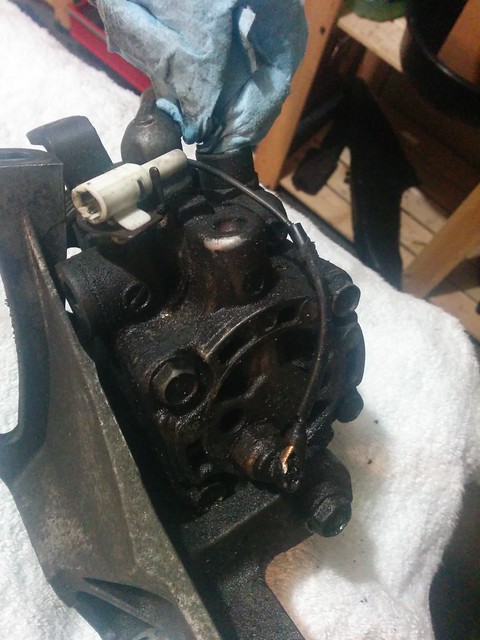
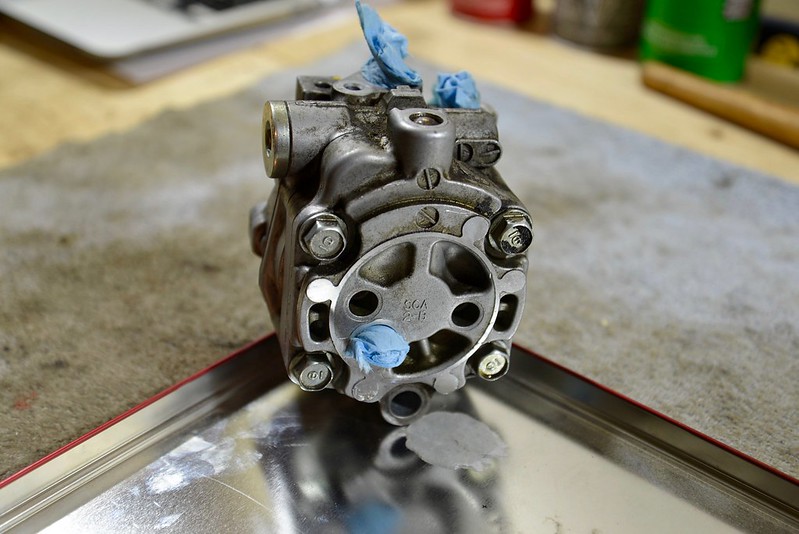
Here's a picture of my WRX pump which took a LONG time to clean up:
15) Take the opportunity for a break and unplug the paper towels from the suction and discharge connections and let the pump drain out for a few minutes. If you're disassembling the pump while it's full of oil things are going to get messy. Re-plug the holes when you're done as it will continue to drain the more you turn it over back and forth.
--------------------------------
Following process will help you rebuild your PS pump:Going forward, a shop vise (with soft jaws) and an impact gun are going to make your life a whole lot easier if you're soloing this. You can work without the vise but you're going to struggle without an impact or a second set of hands.
16) Remove the 10mm bolt holding the temp sensor cable bracket and suction elbow. Remove the temp sensor cable by pulling it straight off the connector on the back of the pump. Convince it with a screwdriver if you need to.
(Photo by maxxell, iWSTi)
17) Suction elbow comes off easily and this o-ring is the one typically leaking. We're not going to stop here as there's plenty more inside the pump which are completely baked hard and in need of refreshment.
This is a dash 014 o-ring. You may as well remove the old and install the new one now.
Tip: use fresh Dexron III ATF fluid to lube the o-rings during reassembly. Don't install dry rubber against clean metal.
(Photo by maxxell, iWSTi)
18) Going forward you have a couple of options. I have listed them in the order
I would do them seeing as I have a vise to grip the pump.
You may wish to leave the pulley attached until the last step so that you have something to grip while you're trying to separate the pump and the mounting bracket. Before you even begin to crack the pump open you'll need to (in any order):
a) Remove the pulley cover bracket
b) Remove the pulley
c) Remove the pump mounting bracket
d) Remove the oil temperature switch
18a) Remove the 10mm bolt holding the pulley cover bracket to the pump. This little bracket is a pinch point and if you get unlucky you can snag a finger against the pulley... not nice if you happen to be using an impact to crack a bolt and the gun grips and rotates the pump in your hands. The bolt is shown accessible here in the bottom left hole of the pulley. While you're at it you can also remove the two 12mm bolts holding the face of the pump to its mounting bracket, also shown:
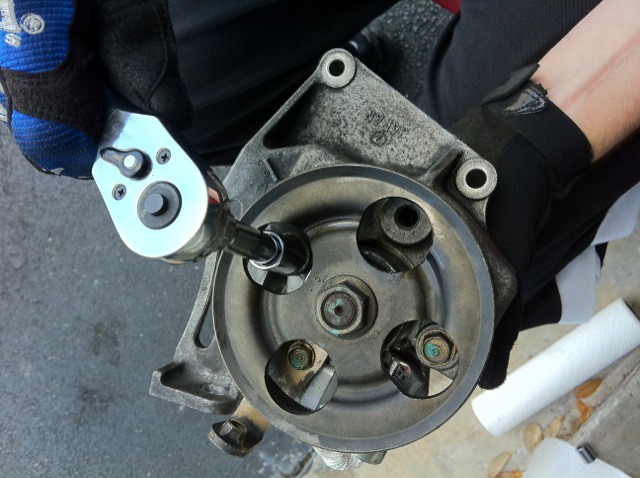
(Photo by maxxell, iWSTi)
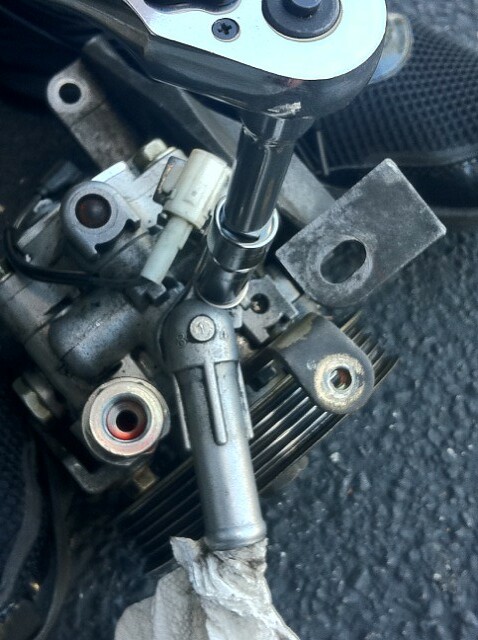
18b) Remove the 19mm nut holding the pulley. Push a decent sized screwdriver in one of the pulley holes and lock the pulley against the pump housing to help crack the bolt. Impact is useful here. See previous photo for a picture of the nut.
18c) On the back of the pump you'll find a 14mm long bolt which goes right through the pump. You need to remove this bolt and then you can lever the pump out of the bracket. It's a tight fit and won't go easily, so use a decently large screwdriver or slim lever tool of your choice. NOTE, be mindful of the temperature switch as shown in the below photo. I have no idea how hard these are to source if you damage/break it. You can be careful now and remove the switch later as per step 18d) or you can remove it prior to levering off the bracket, plugging the hole with paper towel to reduce the amount of oil spillage. I left it in place but was careful not to damage it.
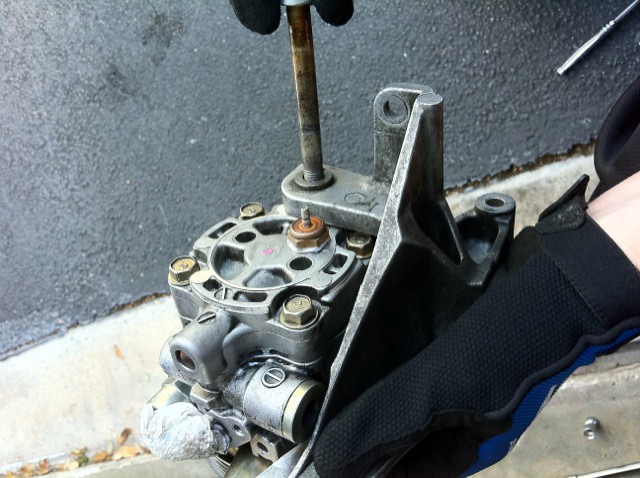
(Photo by maxxell, iWSTi)
Ends up looking something like this:
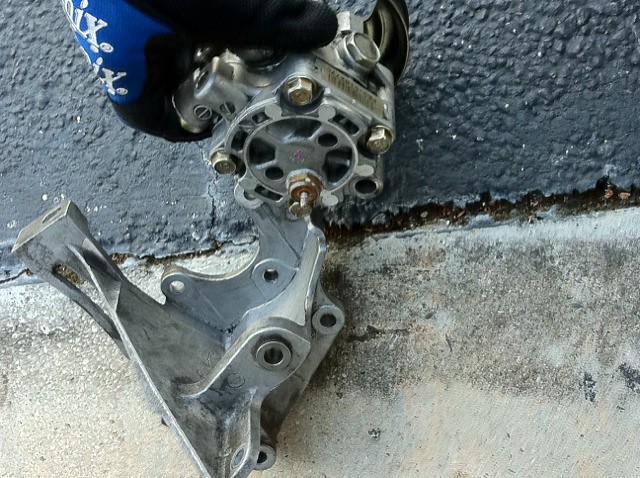
(Photo by maxxell, iWSTi)
18d) Remove the oil temperature switch and plug the hole with paper towel. I can't be certain, but I think it was 17mm.
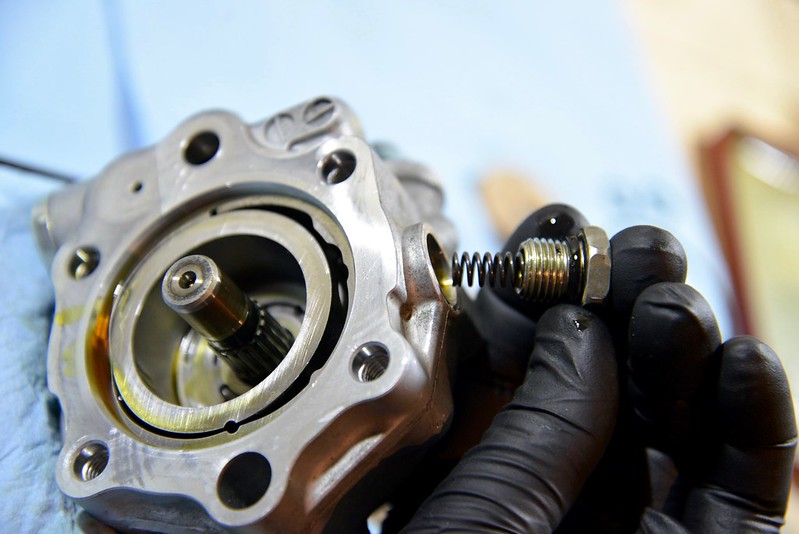
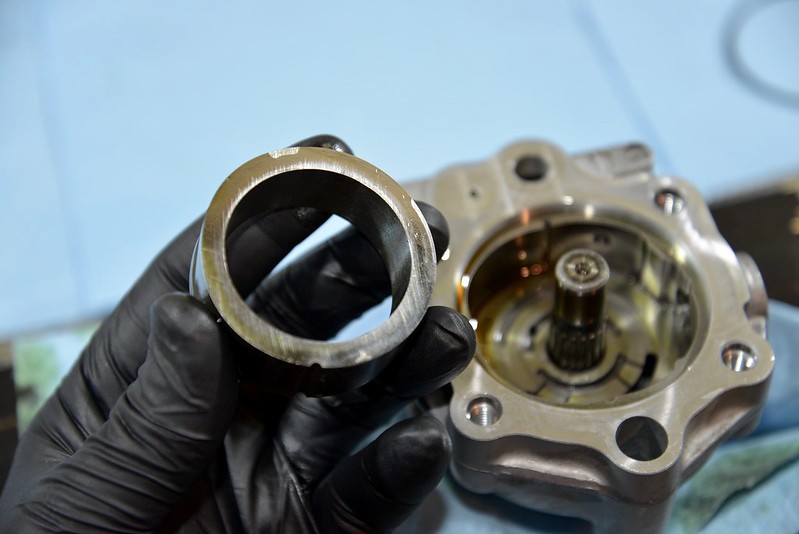
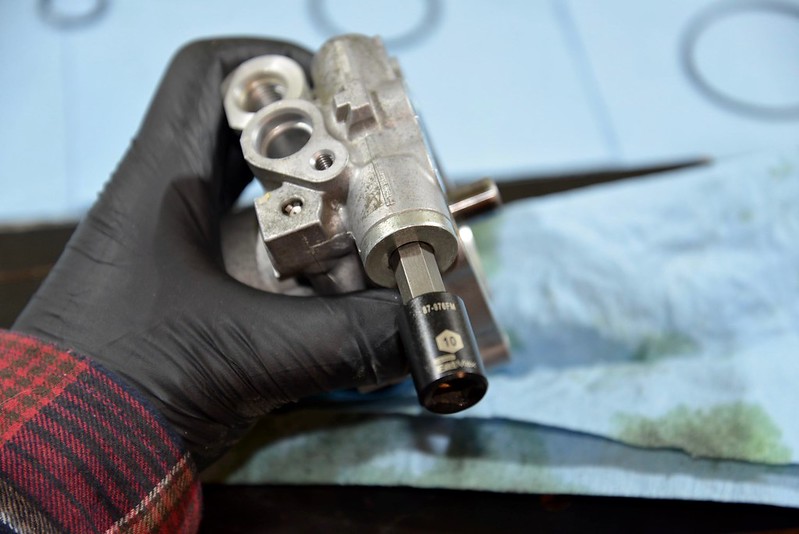
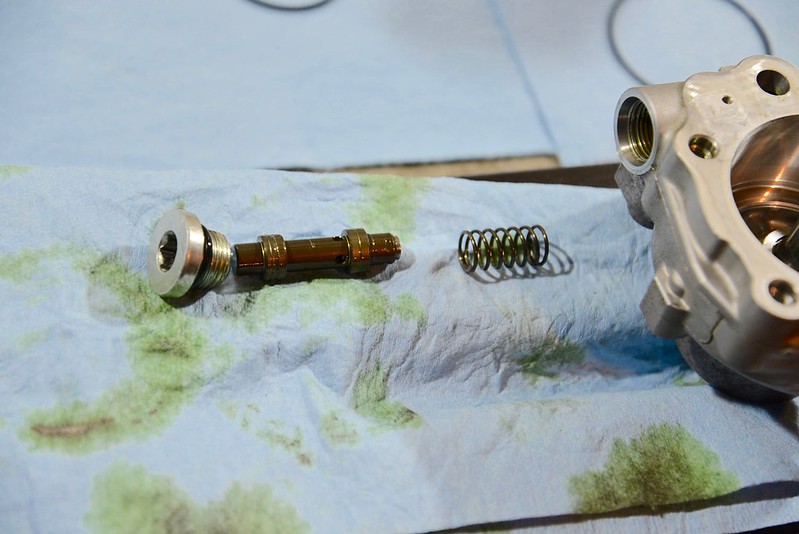
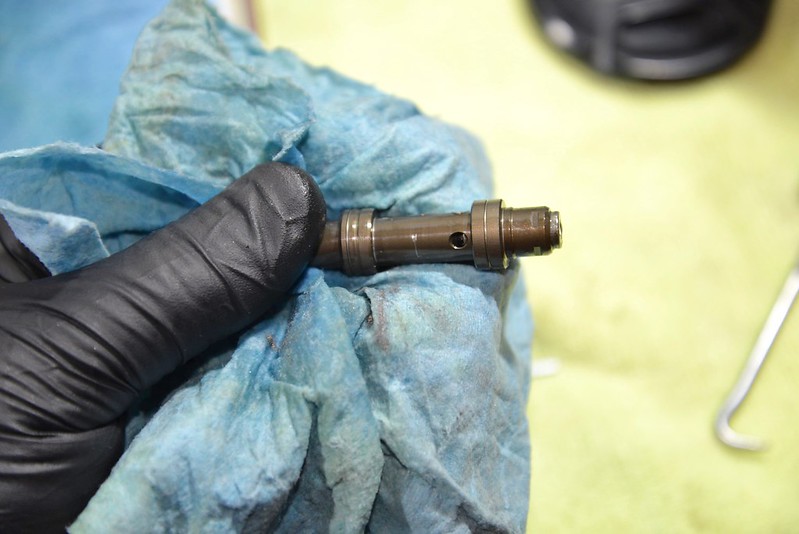
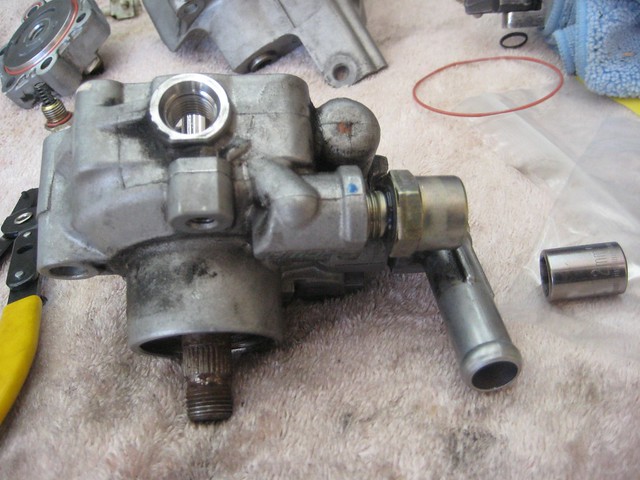
19) Remove the high pressure (discharge) standoff. I can't remember if this is 21mm or 22mm.
Somebody please get back to me with this so I can update the DIY. I may have used a large crescent wrench.
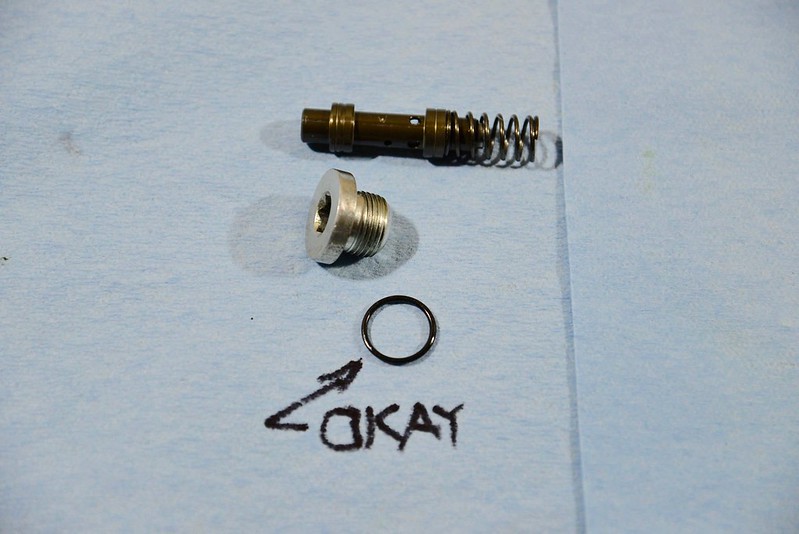
There is a dash 014 o-ring on the neck which is a probable leak, most definitely deformed and in need of replacement. You may as well remove the old and install the new one now. I recommend plugging the hole with paper towel until we're done cleaning the outside of the pump.
(Photo by 68Cadillac, NASIOC)
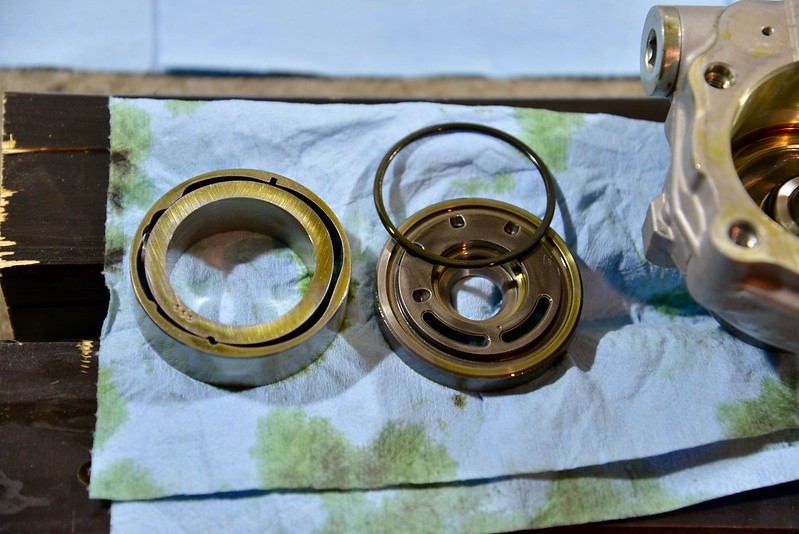
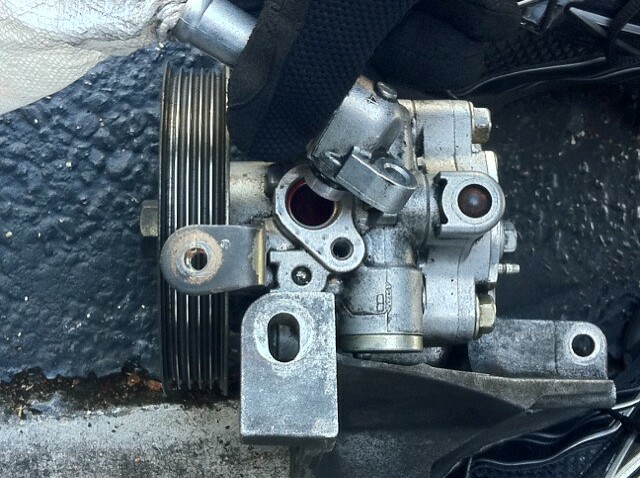
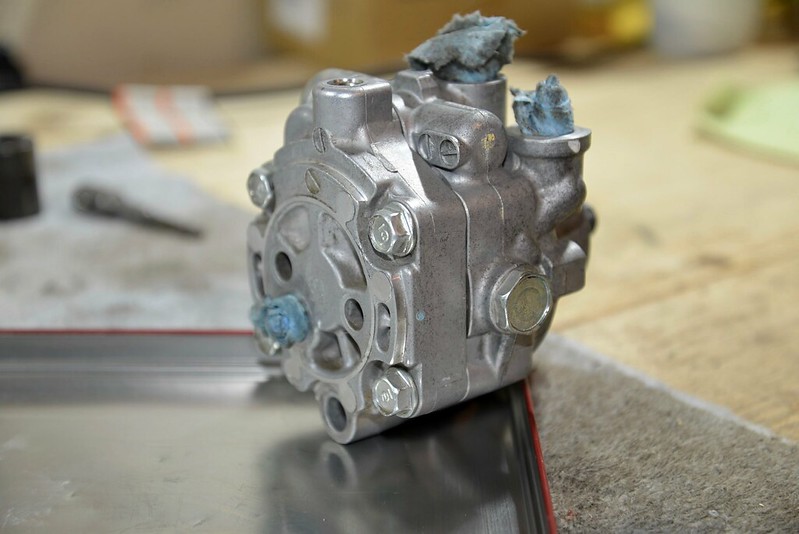
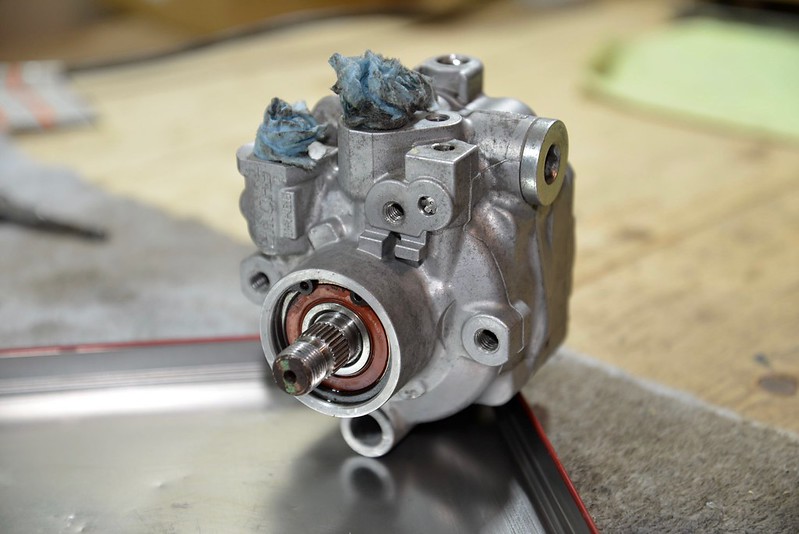
You end up with a pump which eventually looks something like this:
Other side:

20) Clean the pump. I used degreaser and a toothbrush to break up the outer muck and then brake cleaner to get me to this point:
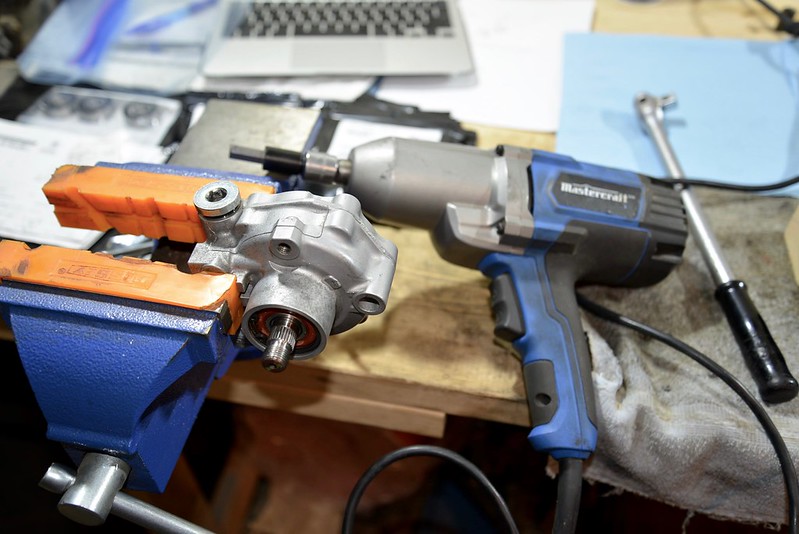
21) Rest the pump, with the pulley side down, exposing the four 12mm bolts on the backing plate. Keep the pump positioned like this when you remove the four bolts
or you are going to have a bad day. I rested the pump on a couple of short pieces of wood because it made my life easier. My 18V impact made short work of these:

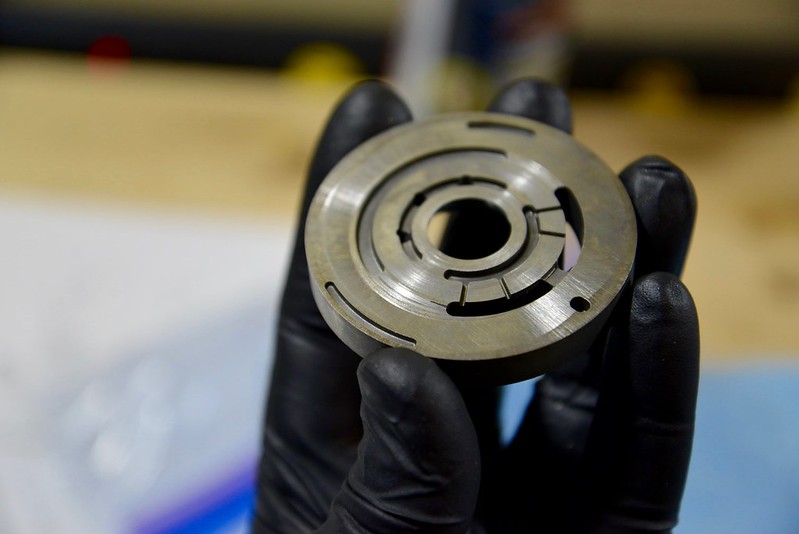
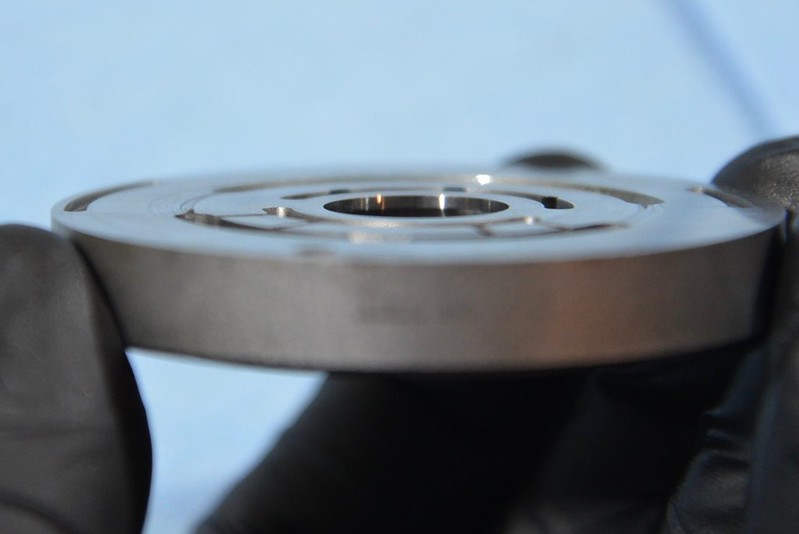
Here's the inside of the backing plate of a 2007 STi PS pump:

For reference, here's the inside of the backing plate of a 2005 WRX PS pump:
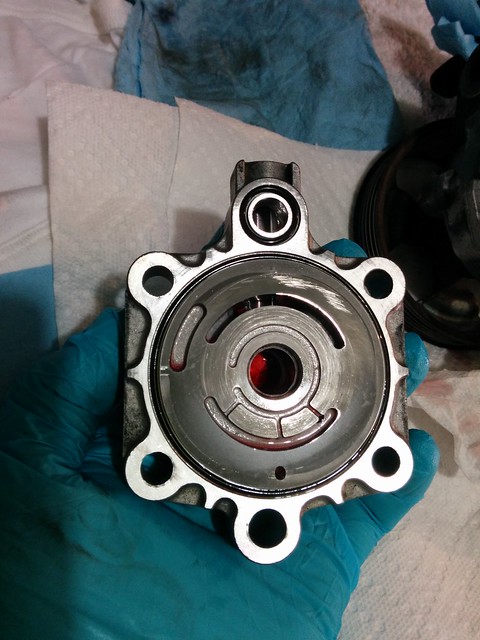 THERE IS NO NEED TO FOCUS ON O-RING SIZES AT THIS POINT.
 That will come later during reassembly.
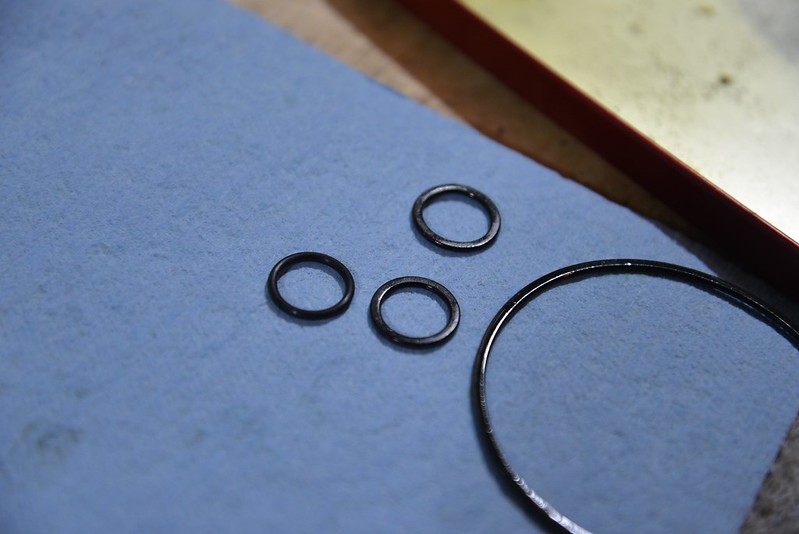
Here's a photo showing the three o-rings from the backing plate on the right and a new one on the left. If you look closely you can see the old o-rings are squashed flat. Not obvious in the photo but they're pretty darn solid and have lost their resilience.
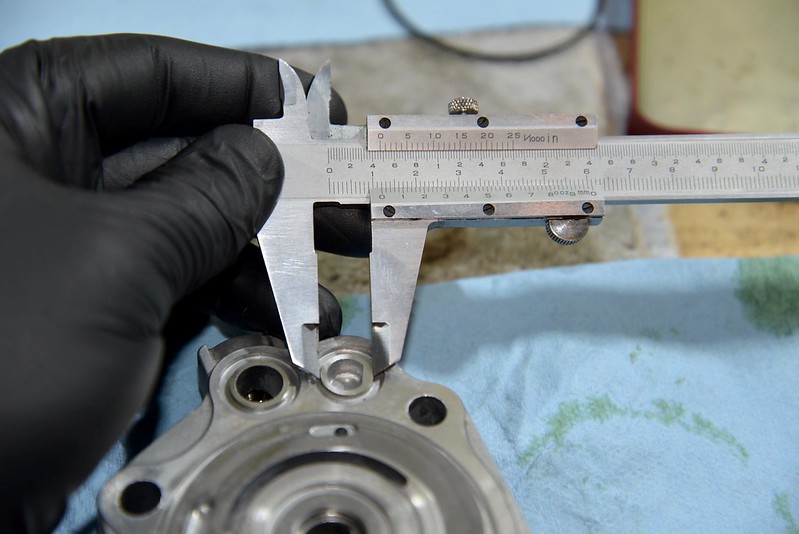
This photo is for reference for anyone who's working on a 2007 STi PS pump. This o-ring hasn't been documented before. The recess ID is 12mm so
this o-ring is a dash 014 (o-ring size will be repeated during reassembly):
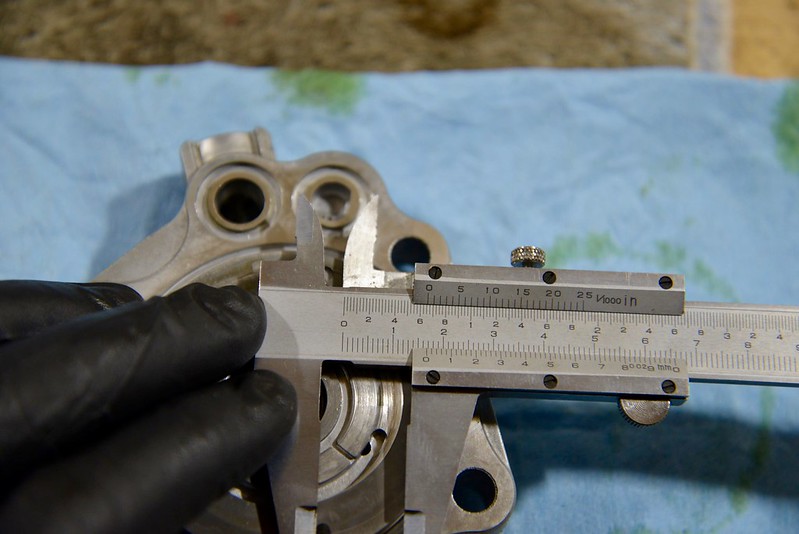
The recess OD is 16.7mm. Couldn't hold the vernier and the camera at the same time so trust me on the measurement. OD isn't critical anyway:
At the tip of the pick you'll see a white and black bushing. This is a nitrile piece resting against teflon (or a teflon equivalent). Note: the teflon contacts the pump barrel and the nitrile is just there for flexibility so remember this when reassembling the pump:
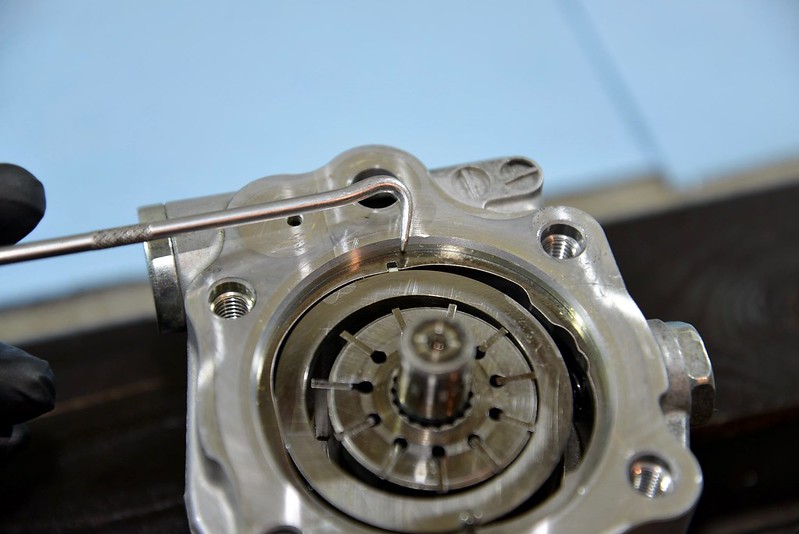
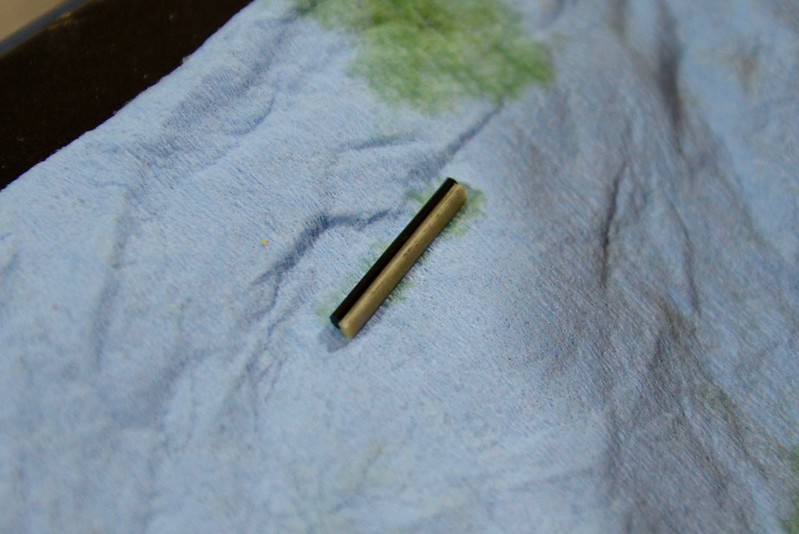
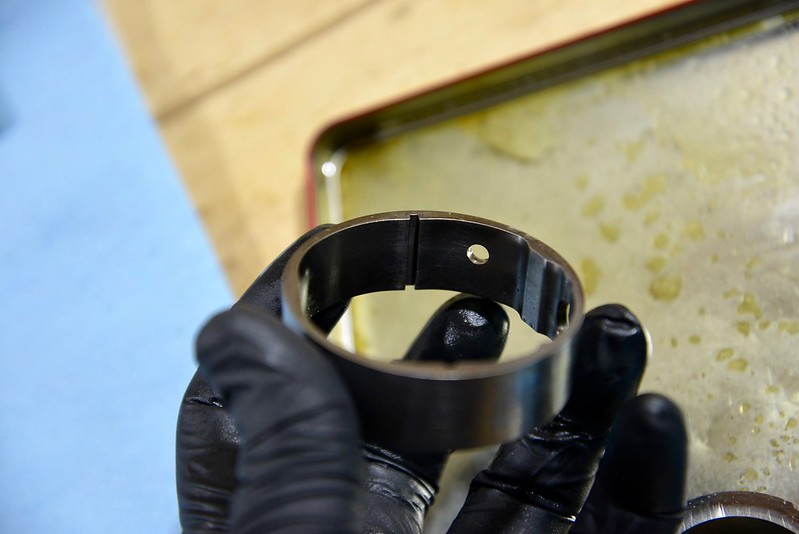
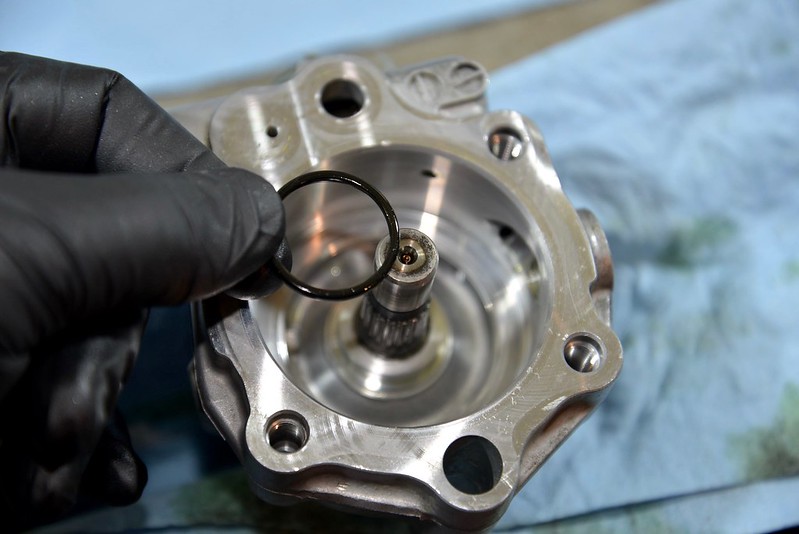
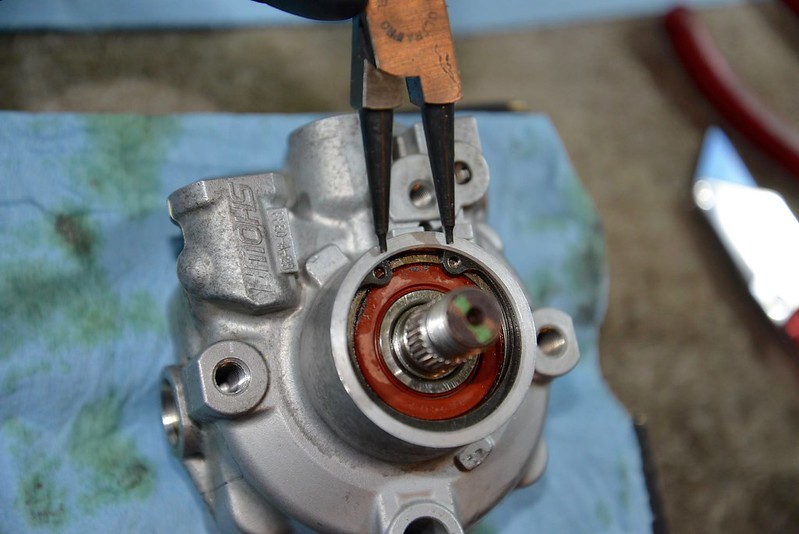
22) Remove the locator pin:
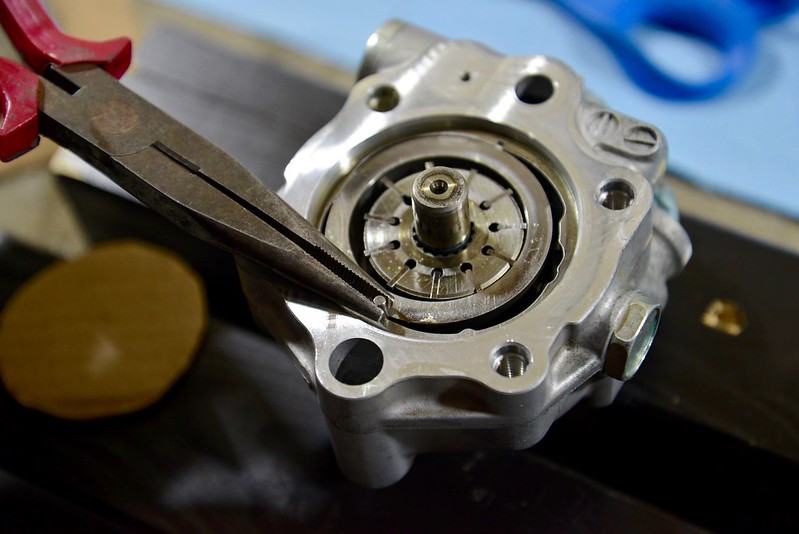
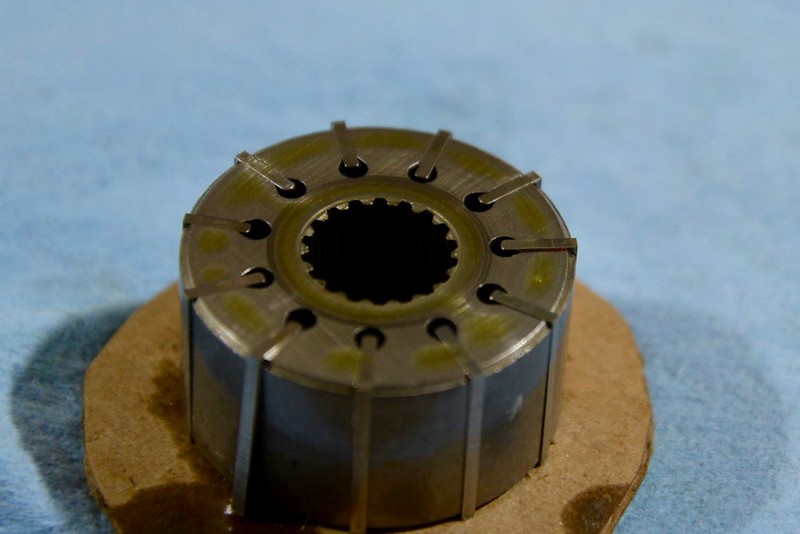
23) Do yourself a favour and cut out a small circular piece of cardboard which covers the vanes:
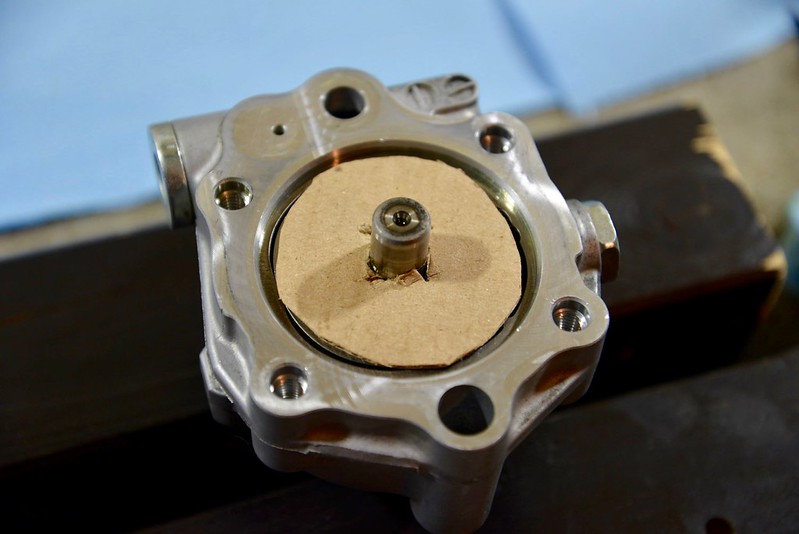
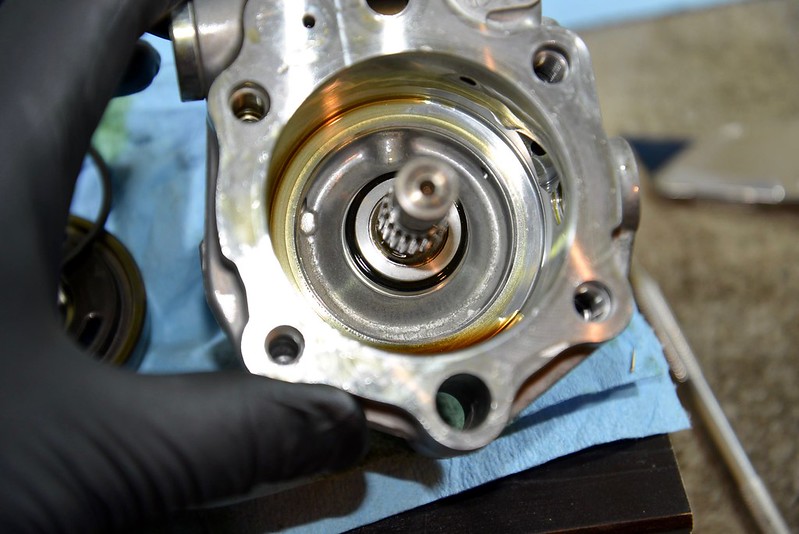
Tip the pump over and tap carefully until the core slides out. Be gentle so that the vanes stay assembled inside the core:
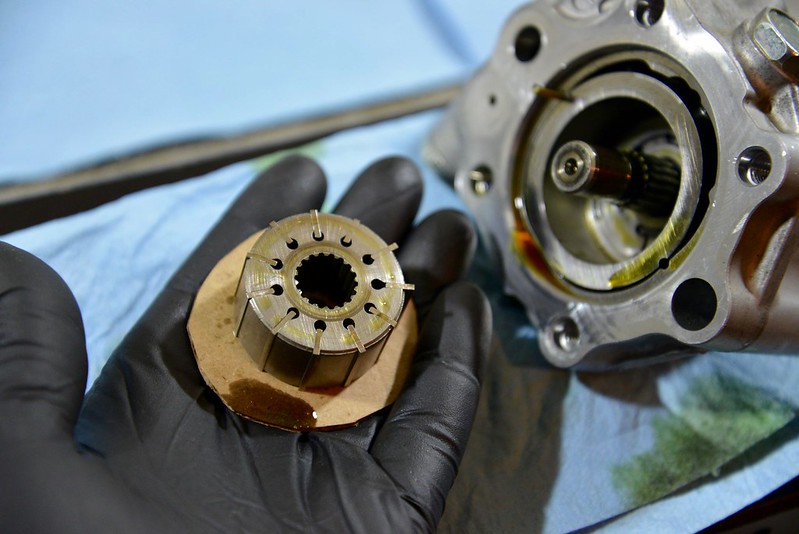
Close up of the core, showing the vanes. Note the vanes have rounder edges on the inside and sharper edges on the outside. You'll thank me later when they start to slide out during cleaning and you need to reassemble the core: