Author Topic: 2015 Impreza Retrofit  (Read 5936 times)

0 Members and 1 Guest are viewing this topic.

Offline cmyrick

  • Stubbly Faced
  • **
  • Posts: 38
  • Location: Alberta
  • Ride: 2007 STi
2015 Impreza Retrofit
« on: December 18, 2016, 03:47:55 pm »
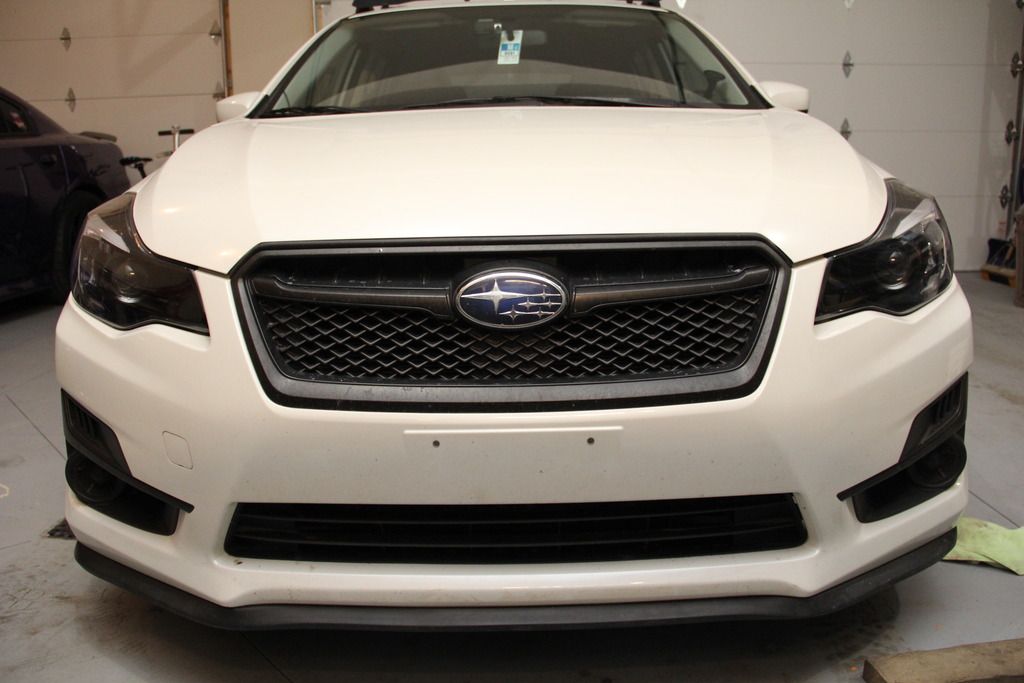
Thought I'd post up some pictures of a retrofit that my brother and I did today. Took about 9 hours all in.

Everything used in the retrofit:
- Bi-Xenon Morimoto Mini D2S 4.0 Projectors
- 35W Ballasts
- 5500K HIDs
- H11 Harness
- Bullet Shrouds
- High Beam Splitters
- Amber Chrome Signal Bulbs
- Yellow Halogen High Beams
- Krylon Black (Fusion For Plastic) Paint
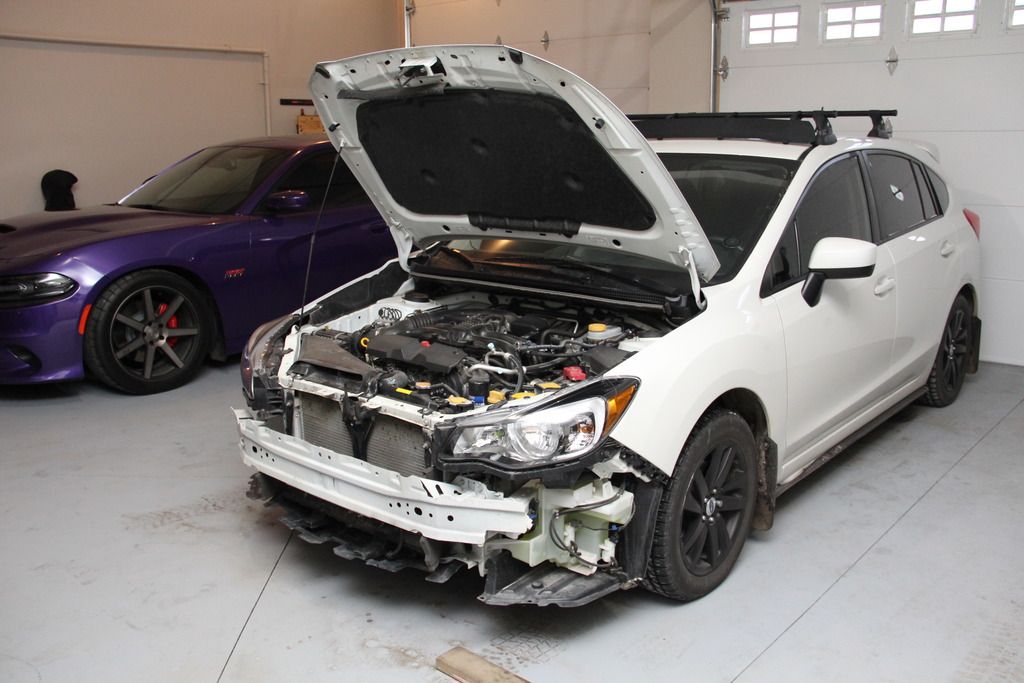
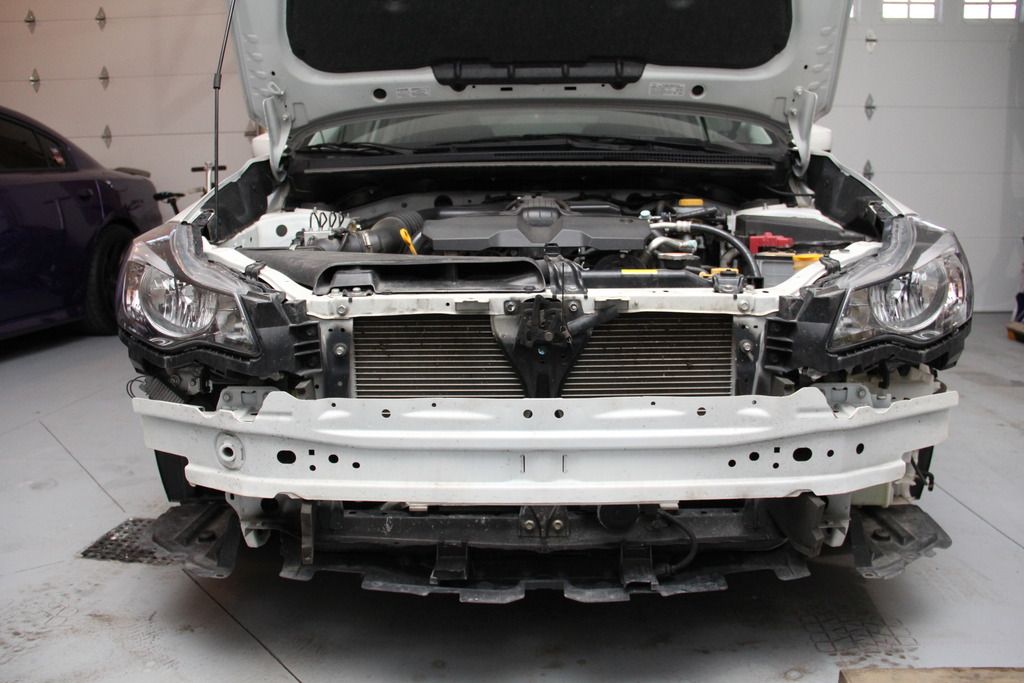
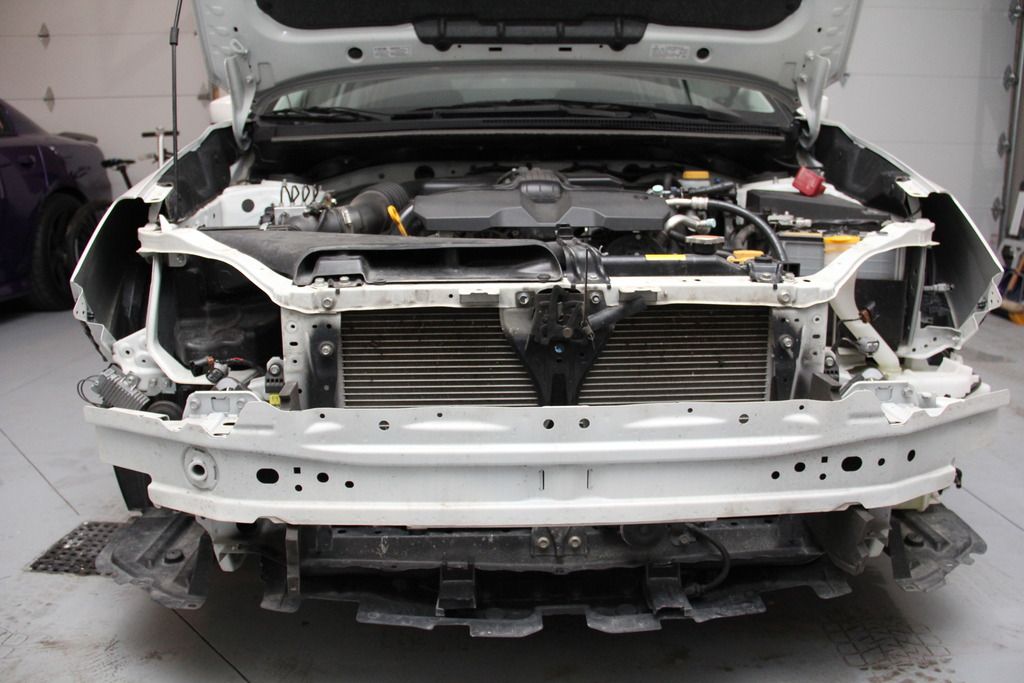
1. Remove Bumper

First thing to do was remove the bumper. There are 6 clips on top attached to the grill. There are also 5-6 clips on the bottom which are insanely annoying to remove sometimes.


2. Remove Headlights

With the bumper off, you can get to all of the necessary clips and pins to remove the headlights. There should be (5) 10mm bolts for each headlight if I can remember. (Don't have any pictures, as I wasn't planning to do a thorough write-up).


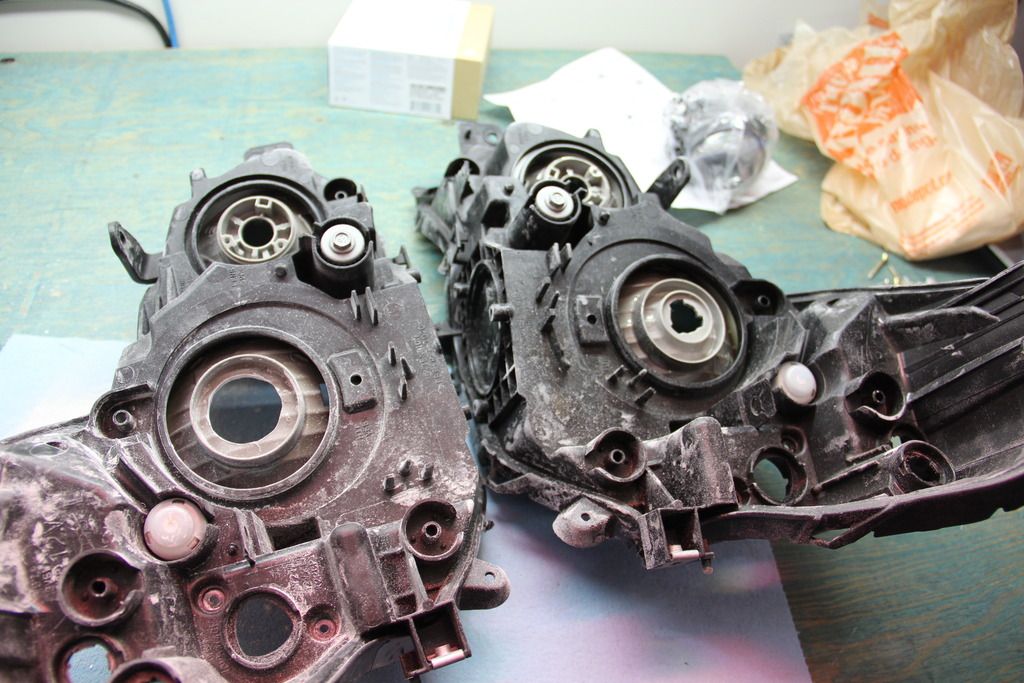
3. Remove Everything From Headlights

Next, you'll want to unplug and disconnect all of the wiring and bulbs from the lights. The wiring harness for the bulbs is wedged into the back of the light and connected by one grey connector.


You also want to remove all of the grommets, screws, etc. There's a mounting plate for the high beam that is held on by 2 screws. Basically, the only thing that I didn't remove from the back of the housings were the vertical adjustments screws.


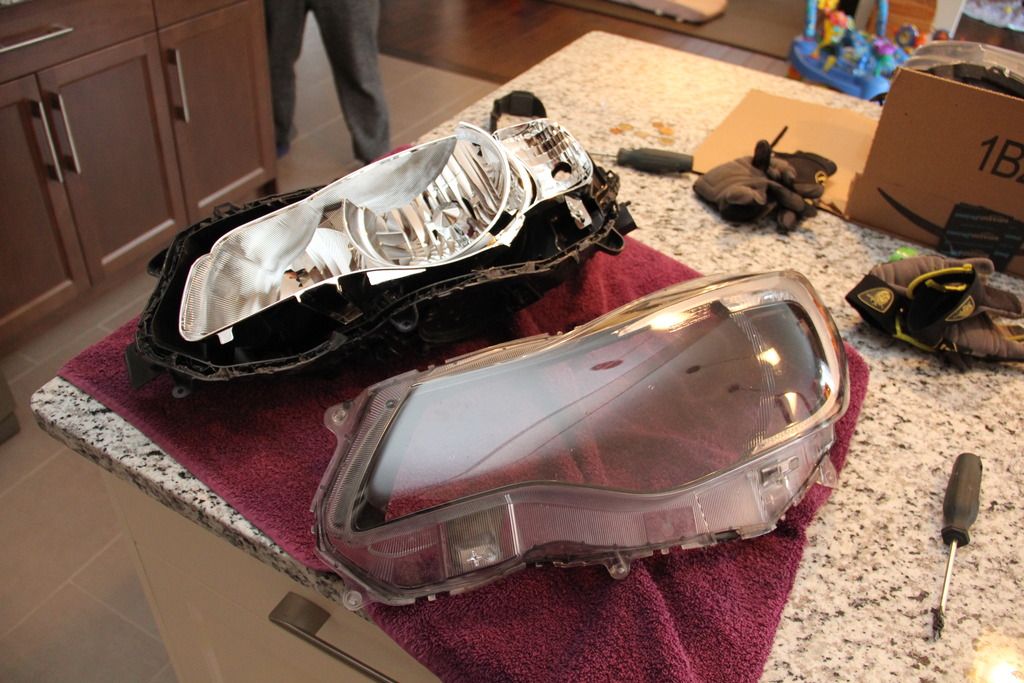
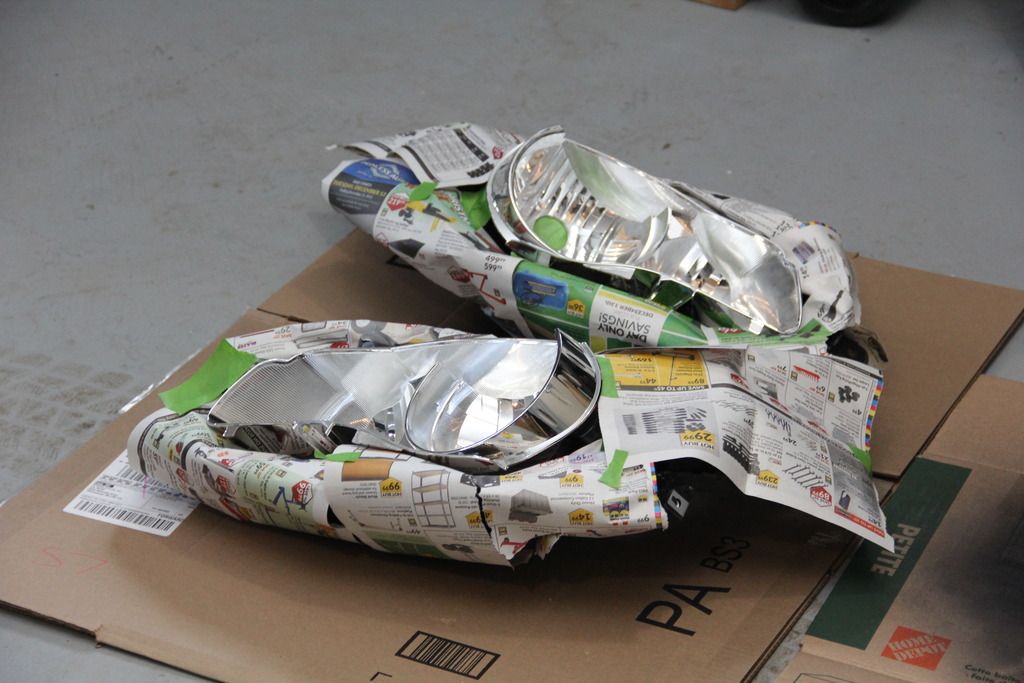
4. Opening the Headlights

After watching multiple videos and reading up on different temperature/time combinations for the lights, I decided to go with a conservative 200F for 17 minutes. I wanted to apply the least heat for as long as necessary in fear of melting the headlight. I know some people say 260-270F for 7 minutes, but this worked just fine. There are tabs on the top and bottom of the headlights that you'll want to pry with a flathead while also pulling the 2 pieces away from each other. Once you get the separation going, make sure that you are mindful of the adhesive. It stretches quite a bit and if you let it shoot off, it could hit the inside of the lens and that wouldn't be good.


There are a few screws holding this piece to the lens. You won't need to remove this if you aren't planning on touching the reflector. Since I wanted to paint the reflector black, I took it off. The reflector is held on by 3 tabs.


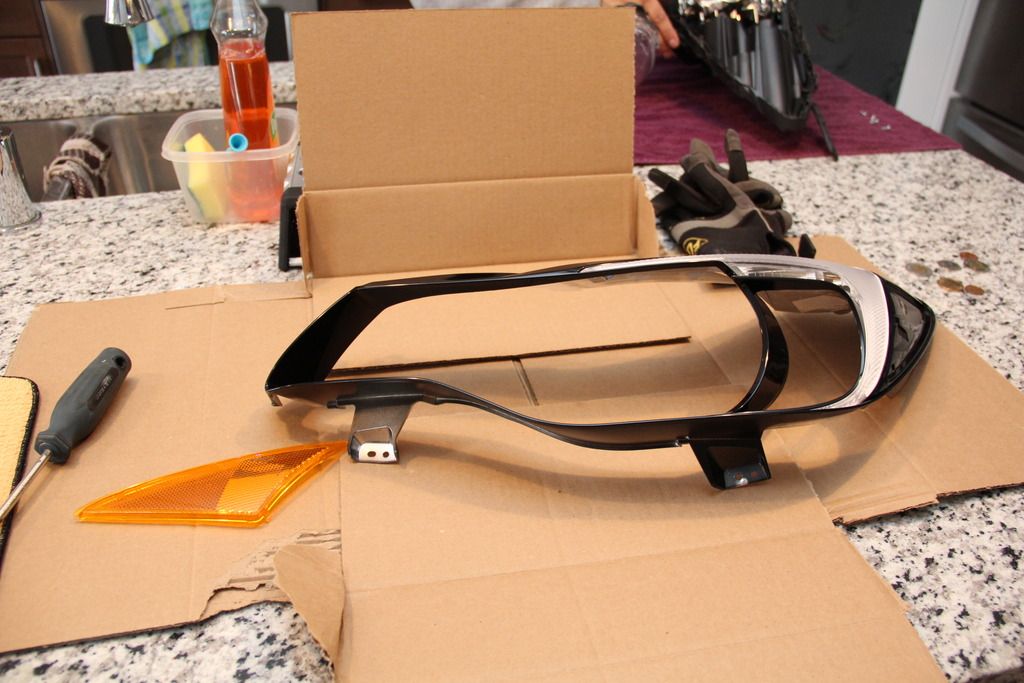
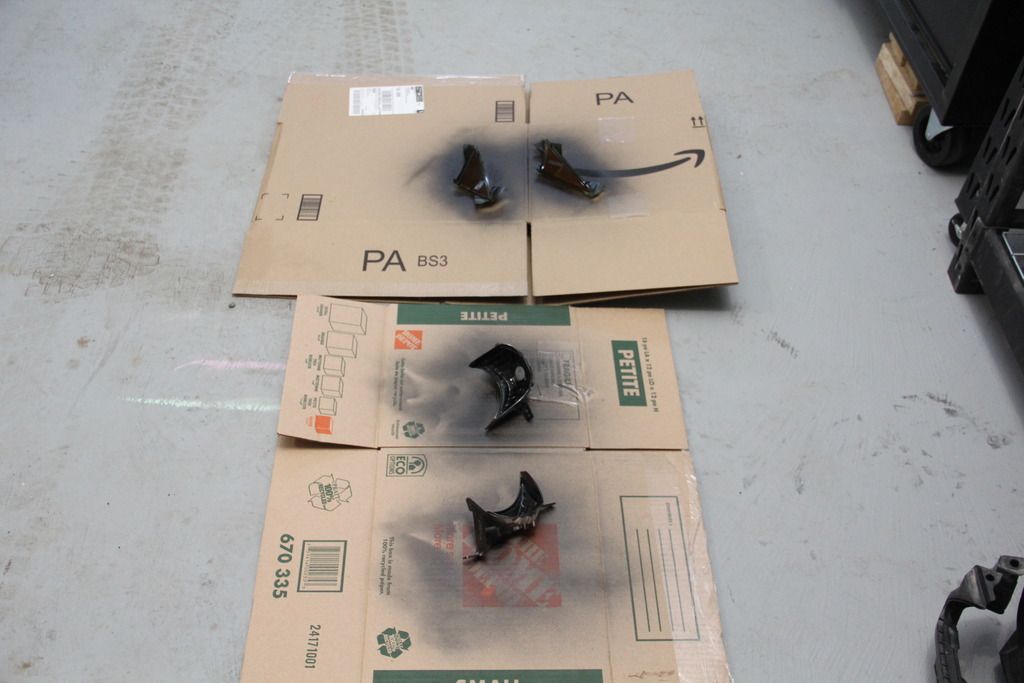
At this point, we removed the signal housing (2 screws) from the rest of the housing and painted the housing and the back of the reflector.


5. Fitting the Projectors

You'll want to use a dremel with a sanding band in order to cut down the plastic. The shaft of the Mini D2S projector is 35mm wide. If I had to do this project again, I would recommend going with the Mini H1 projector, as the shaft is 20mm (15mm skinnier). If you went with the Mini H1, you'd be able to get the Mini Gatling Gun shroud, which would require minimal cutting.

Anyways, eye it up and start trimming.

This is how much you need to cut in order to fit the D2S projectors:


6. Fitting the Shrouds

I didn't take any pictures of us lining up the shrouds, but this is what it should look like. We needed to take quite a bit off of the top of the shrouds in order to clear the top of the housing.


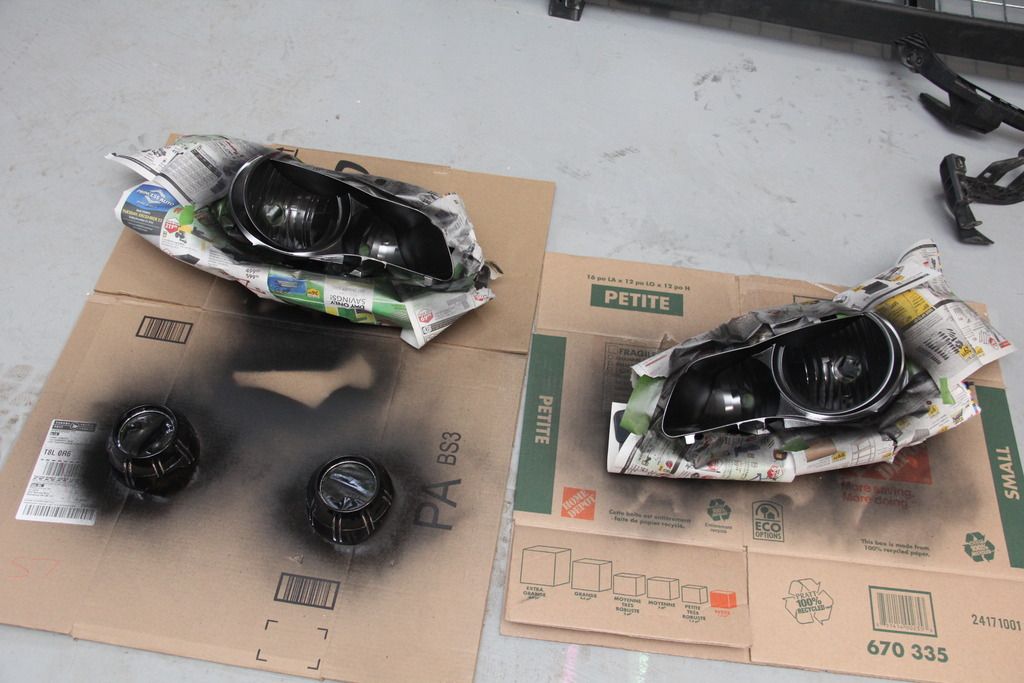
7. Painting the Housings and Shrouds

Next, I masked the housings off. We did 3-4 light coats with 15 minutes in between for both the housings an the shrouds. The paint we used was good to handle after 15 minutes and fully dried after 1 hour, so we waited an hour.


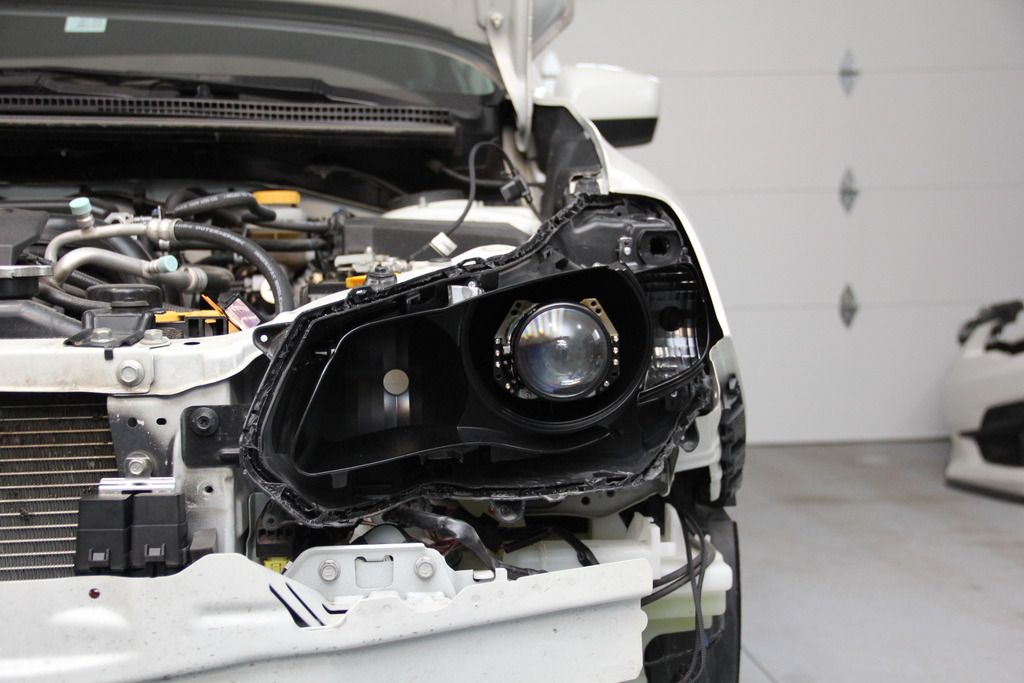
8. Mounting the Headlights

Since you want to make sure the projectors are horizontal, you want to mount the projectors and bulbs and then mount the headlights onto the car. Once you are happy with the orientation of the projectors, tighten down the mounting nut on the back. This part is terrifying because the nut is designed to deform on itself if it starts to loosen. This part is permanent.


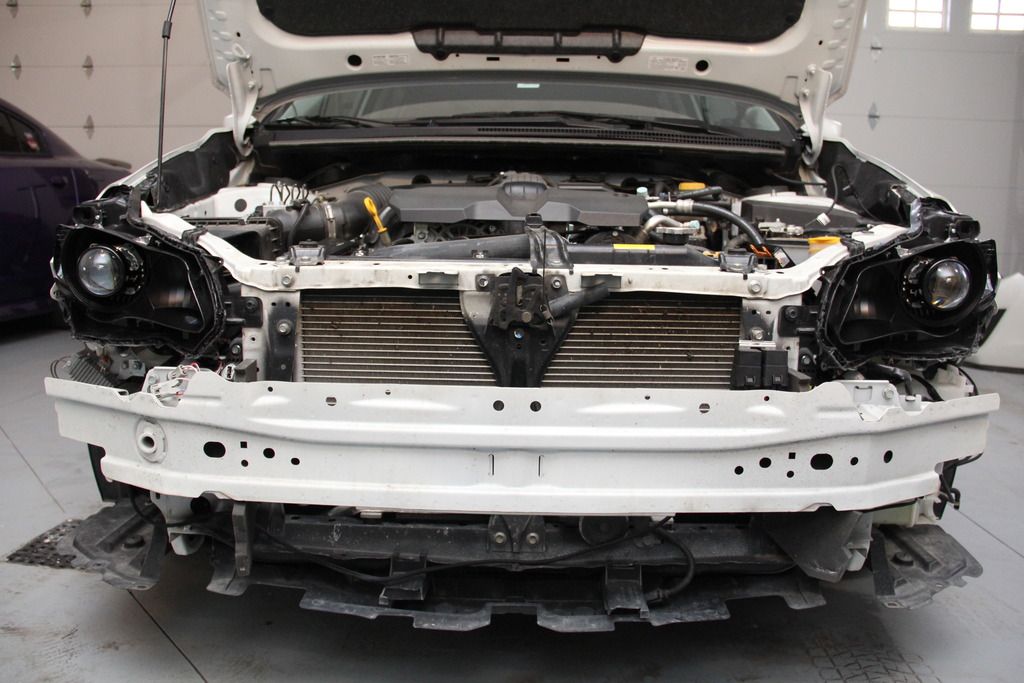
You can see how I mounted the relay in an upright position to try to prevent water from harming it. There was a pre-existing hole that was conveniently drilled.


9. Mounting the Shrouds

Using JB Weld, you want to put some onto the rim of the inside of the shroud or onto the edges of the projector. Since we had to cut the tops of the shrouds so much, there was only one way to mount it onto the projector. Obviously, if you had a smaller shroud, then the orientation of it likely wouldn't matter.

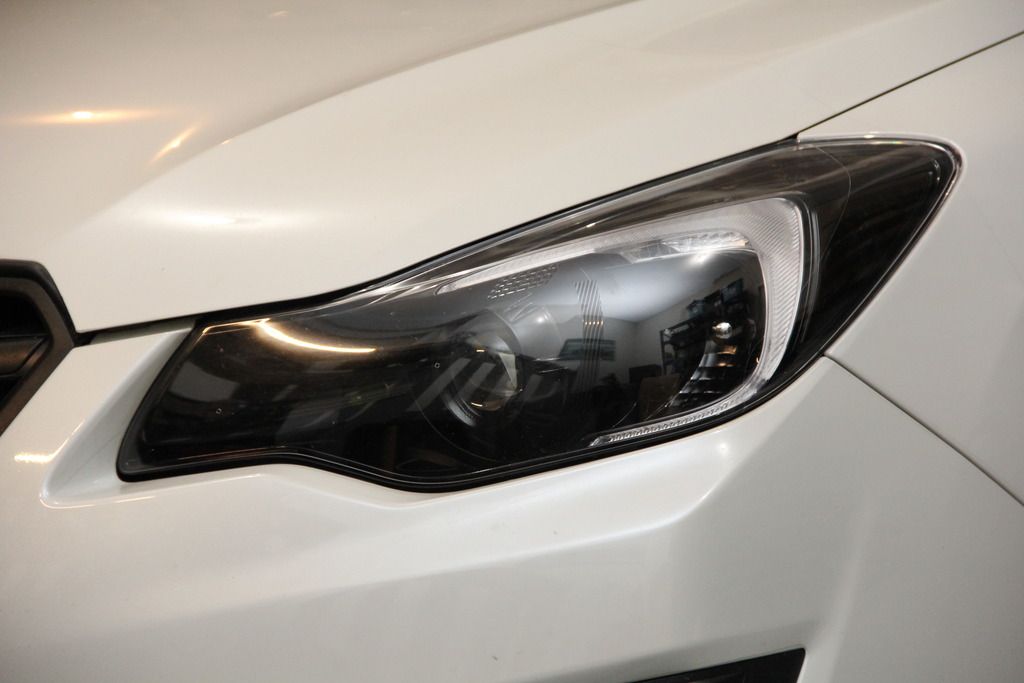
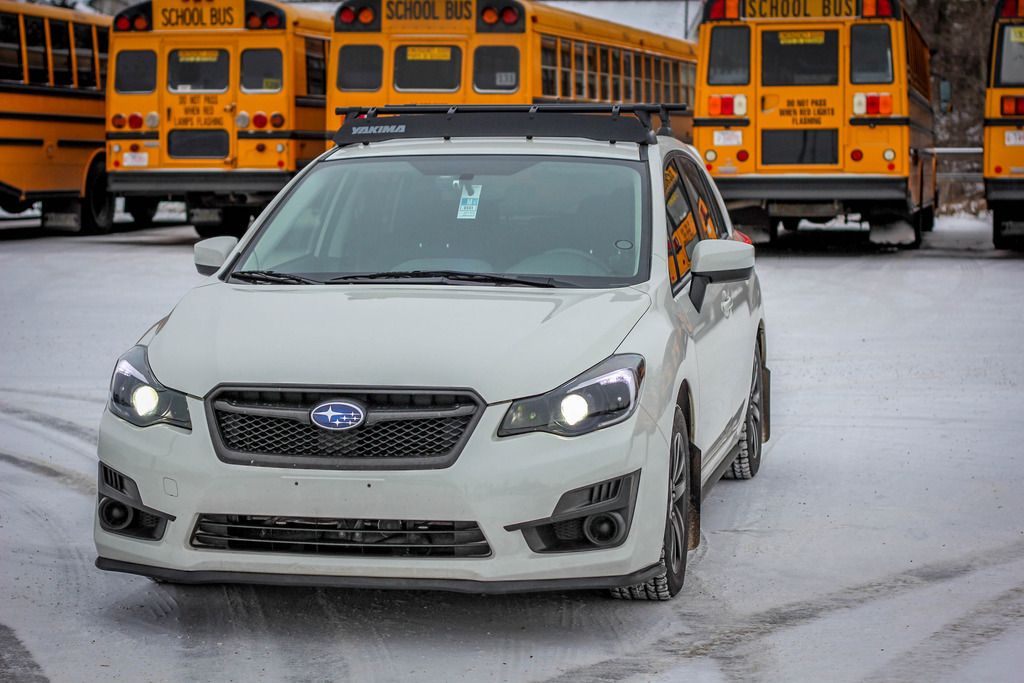
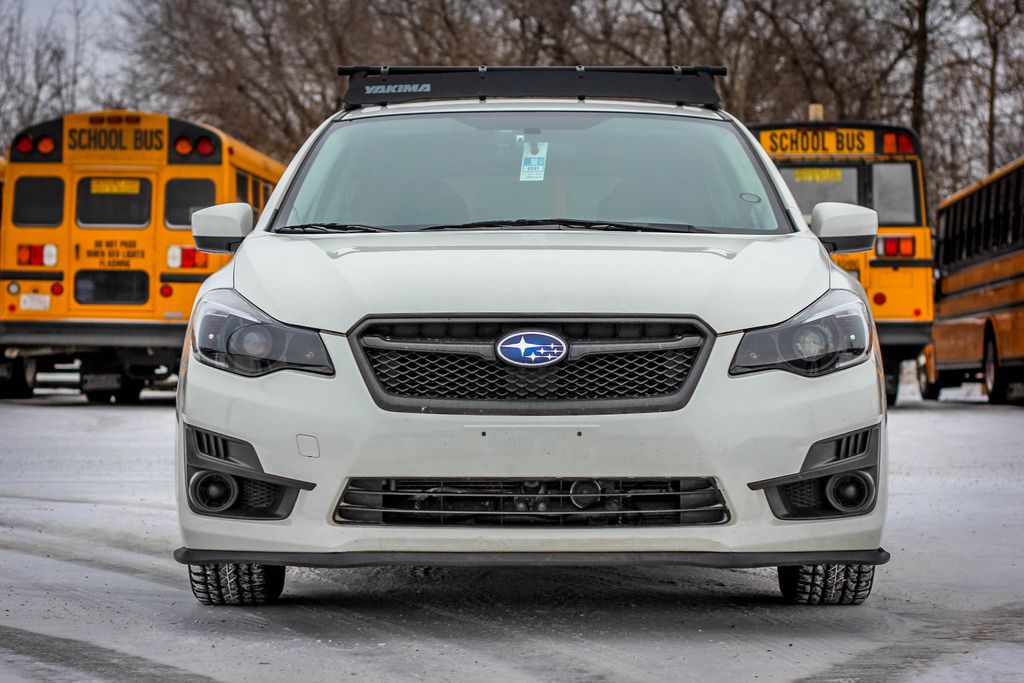
With some regret of obliviously getting massive shrouds, I love how much they fill in the housing.


10. Reassembly

Finally, you'll want to take the headlights back inside and turn the oven back on. Make sure you take the bulb and the ignitor out before putting the headlight back in the oven. Screw the 2 pieces of the headlight back together the best you can, and then put it in the oven for 5-10 minutes at 200F. Once you take it out of the oven, pry all the tabs back together and everything is straight forward from there.

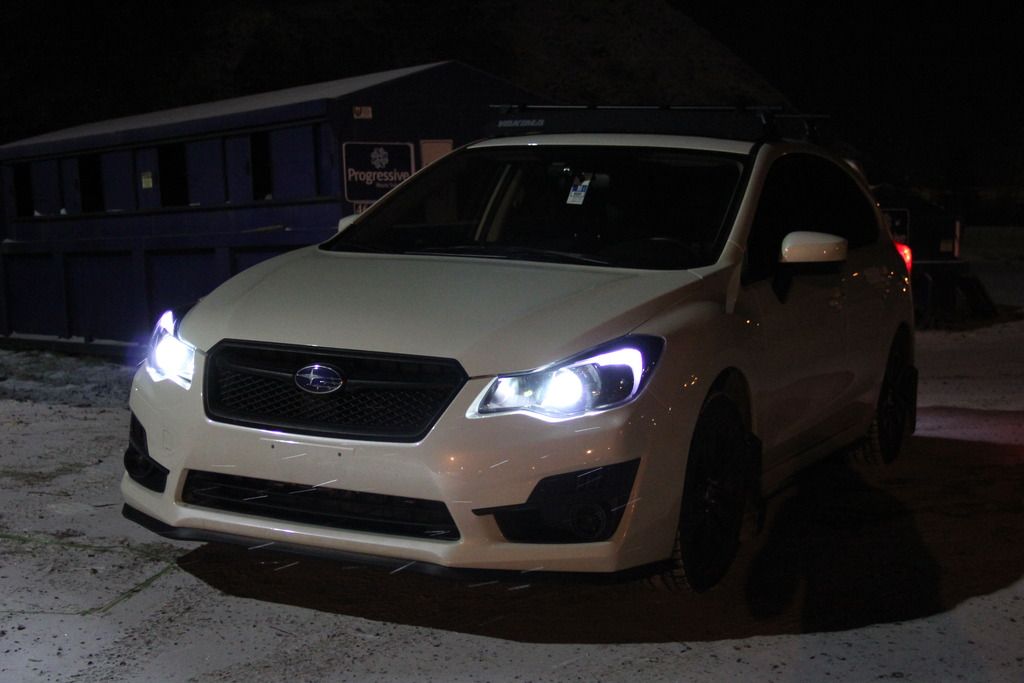
Unfortunately, I didn't take any pictures of the wiring harness. You want to mount the relay in an upright position to ensure that water doesn't go inside. Then, mount the ballasts wherever works. I also want to mention that I bought the high beam splitters because my high beams are my DRL's. This also means that I have quad high beams, but yellow halogens in a blacked out reflector don't do much. There is a picture farther down the thread.


Offline kijho

  • WSC Moderator
  • Rivaling ZZ-TOP
  • *
  • Posts: 6773
    • @Shpixx
  • Location: Calgary, Alberta
  • Ride: 2020 Tacoma TRD | i used to have a cool wrx
Re: 2015 Impreza Retrofit
« Reply #1 on: December 18, 2016, 04:00:29 pm »
omg....

Offline 10secdream

  • Vendor
  • Rivaling ZZ-TOP
  • *
  • Posts: 4298
    • ReflectiveAutoDetailing
  • Location: Sherwood Park, Alberta
  • Ride: 2022 Toyota GR86, 2007 Lexus GX470
Re: 2015 Impreza Retrofit
« Reply #2 on: December 18, 2016, 04:16:16 pm »
I always love a good retrofit. Great job.
2003 Mazda Miata
2015 WRX Build
2004 Forester XT Build

“When you see the tree you’re about to hit, it’s called under steer. When you can only feel and hear it, it’s over steer.”

Offline diamondedge

  • Rivaling ZZ-TOP
  • *****
  • Posts: 2348
  • stir fryin' noobs
  • Location: Calgary, AB
  • Ride: 2007 WRX, 2008 spec.B
Re: 2015 Impreza Retrofit
« Reply #3 on: December 18, 2016, 04:53:59 pm »
omg....

I said that at first then I saw the throw and cutoff and promptly dropped my jaw onto my lap

Great uckfaying work man. That is amazing. I should get chrome amber bulbs..


^Click^
sig by shpixx x diamondedge

Offline cmyrick

  • Stubbly Faced
  • **
  • Posts: 38
  • Location: Alberta
  • Ride: 2007 STi
Re: 2015 Impreza Retrofit
« Reply #4 on: December 18, 2016, 05:11:54 pm »
I always love a good retrofit. Great job.

I said that at first then I saw the throw and cutoff and promptly dropped onto my lap

Great uckfaying work man. That is amazing. I should get chrome amber bulbs..

hahaha thanks guys! I originally got the amber chrome bulbs so that they would blend into the reflector housing, but we ended up painting everything black. they look good regardless, and the light output is still more than enough

Offline thedude

  • Beards Comin in Nice
  • ****
  • Posts: 752
  • Location: Kelowna, BC
  • Ride: 2002 Toyota Tundra
Re: 2015 Impreza Retrofit
« Reply #5 on: December 18, 2016, 10:47:01 pm »
Wow, great work man! Can't ask for much better results!

Where did you get the yellow highbeam bulbs, and do they run as DRL?
2008 Aprilia Shiver 750 - Sold 10/02/2017
2013 SWP Subaru WRX Hatchback - Sold 01/04/2022

thedude's 2013 WRX Build Thread

Offline RedBimmer93

  • Rivaling ZZ-TOP
  • *****
  • Posts: 2734
  • Location: Calgary, AB
  • Ride: 2008 Legacy Spec B, and Two Mopar gas guzzlers
Re: 2015 Impreza Retrofit
« Reply #6 on: December 18, 2016, 11:58:11 pm »
That looks mean!! Great work!!

Offline cmyrick

  • Stubbly Faced
  • **
  • Posts: 38
  • Location: Alberta
  • Ride: 2007 STi
Re: 2015 Impreza Retrofit
« Reply #7 on: December 19, 2016, 12:13:29 am »
Wow, great work man! Can't ask for much better results!

Where did you get the yellow highbeam bulbs, and do they run as DRL?

Just off of Amazon. And yeah, I use them as my DRL's.

Link: https://www.amazon.ca/gp/product/B002E2ZUNE/ref=oh_aui_detailpage_o06_s00?ie=UTF8&psc=1


That looks mean!! Great work!!

Thanks!

Offline RockThePylon

  • Rivaling ZZ-TOP
  • *****
  • Posts: 3586
  • Ghetto apostle
  • Location: Calgary
  • Ride: '03 WRX ricekar
Re: 2015 Impreza Retrofit
« Reply #8 on: December 19, 2016, 02:49:27 am »
This thread should have a NSFW tag.

Pure secs.
I may scream like a dainty lady, but I punch like a fairly strong 11-year-old.

Offline Asstuna

  • Rivaling ZZ-TOP
  • *****
  • Posts: 5160
  • Danger zone
  • Location: Calgary
  • Ride: 19 Fiesta ST, 17 Ram
Re: 2015 Impreza Retrofit
« Reply #9 on: December 19, 2016, 03:54:45 am »
Awesome. If you can find time to add some words it could be a DIY post.

Offline cmyrick

  • Stubbly Faced
  • **
  • Posts: 38
  • Location: Alberta
  • Ride: 2007 STi
Re: 2015 Impreza Retrofit
« Reply #10 on: December 19, 2016, 10:27:09 am »
Awesome. If you can find time to add some words it could be a DIY post.

There ya go.  O0

Offline Jimpreza111

  • Beards Comin in Nice
  • ****
  • Posts: 791
Re: 2015 Impreza Retrofit
« Reply #11 on: December 21, 2016, 08:59:20 am »
Man what a fantastic job you did on those! I have been looking at a retro fit but was always concerned about putting the lights in the oven.
Nice to see another new Impreza around here too.

Offline cmyrick

  • Stubbly Faced
  • **
  • Posts: 38
  • Location: Alberta
  • Ride: 2007 STi
Re: 2015 Impreza Retrofit
« Reply #12 on: December 21, 2016, 11:13:57 am »
Man what a fantastic job you did on those! I have been looking at a retro fit but was always concerned about putting the lights in the oven.
Nice to see another new Impreza around here too.

Thanks! I was skeptical about putting them in the oven too, but the lights don't get crazy hot.

And yeah, there's not too many of us around.

Offline cmyrick

  • Stubbly Faced
  • **
  • Posts: 38
  • Location: Alberta
  • Ride: 2007 STi
Re: 2015 Impreza Retrofit
« Reply #13 on: December 27, 2016, 10:32:45 pm »
More pictures of the light output/cutoff.


Offline Dev

  • Rivaling ZZ-TOP
  • *****
  • Posts: 1148
  • Location: Edmonton, Alberta
  • Ride: Magic Carpet
Re: 2015 Impreza Retrofit
« Reply #14 on: December 28, 2016, 03:54:53 pm »
Very satisfying results!! Looks awesome!
My 2006 STI Build:*Sold*
Project "Panda"
My 2014 XT Build: *Sold*
Project "Panda" #2
My 2016 Golf R Build Project "Panda" #3

Offline cmyrick

  • Stubbly Faced
  • **
  • Posts: 38
  • Location: Alberta
  • Ride: 2007 STi
Re: 2015 Impreza Retrofit
« Reply #15 on: December 28, 2016, 06:40:57 pm »

Offline GC84ever

  • Beards Comin in Nice
  • ****
  • Posts: 537
  • Location: Calgary
  • Ride: '01 Impreza 2.5rs
Re: 2015 Impreza Retrofit
« Reply #16 on: December 31, 2016, 03:13:57 pm »
They look amazing.

Offline PROLIGHTZ

  • Vendor
  • Stubbly Faced
  • *
  • Posts: 37
  • Location: Ottawa
Re: 2015 Impreza Retrofit
« Reply #17 on: January 16, 2017, 03:56:54 pm »
Good Job !

Offline bigdl

  • Rivaling ZZ-TOP
  • *****
  • Posts: 2323
  • Location: Calgary
  • Ride: 09 2.5i Hatch RIP
Re: 2015 Impreza Retrofit
« Reply #18 on: March 02, 2017, 03:02:39 pm »
Looks great, I think the retrofit i did in my 09 was one of the best mods I have ever done for day to day driving.  Nothing like having super bright lights at night, I am jealous of my wife's Civic and its stock LED lights.

Offline cmyrick

  • Stubbly Faced
  • **
  • Posts: 38
  • Location: Alberta
  • Ride: 2007 STi
Re: 2015 Impreza Retrofit
« Reply #19 on: March 02, 2017, 08:53:57 pm »
Looks great, I think the retrofit i did in my 09 was one of the best mods I have ever done for day to day driving.  Nothing like having super bright lights at night, I am jealous of my wife's Civic and its stock LED lights.

Thanks! And yeah, proper HIDs make a huge difference compared to the stock halogen reflector housings. Annoying that these cars don't come with at least halogen projectors from the factory.