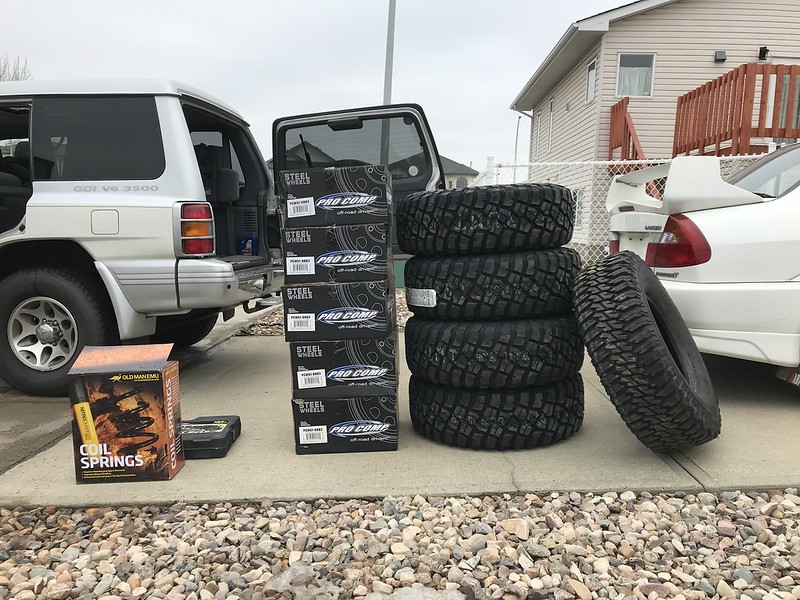
Will they fit?! 5 33's, 5 16x8 still in boxes, new rear springs, spring compressors, tool kit, tool pouch, a bunch of other random tools, all my stuff for a couple weeks of living.
Yes, of course. Room to spare in the passenger seat. IMAGINE a roof rack.


Yes, I nerded out a little about that.
Truck as it rolled into the shop:

Seeing as I needed to replace these little plastic bushes on the torsion bars, I re-indexed them while I had that torsion key off.

I then replaced the rear springs

These are just Medium Duty OME springs, they're a little thicker so should improve the payload a bit, but still ride nice. After installation and settling, they provided about 3/4" of lift.
You can't really tell, but here, after re-indexing the torsion bars, driving and settling, adjusting, driving, settling, adjusting, I finally ended up with about 1/2" lift in the front over what I had originally, and perfect, I mean perfect, height side to side. If you look at the silver lines you can tell, but it is difficult.

Following that, I was deeply offended at the extra amounts of surface rust that showed up over this last winter in Edmonton [read: calcium brine]. So, I might have gone a little overboard with the frame. (Yes, on my DD / hunting truck]. This basically started when swapping over the springs and deciding I might as well paint the spring perches while they're out.
Steps: 1.) Wash the frame big time. Wash everything, I ran water through each hole in the frame until it came out perfectly clear through the drain holes. I even scrubbed with brush.
2.) Hit entire frame with angle grinder + wire wheel to remove any flakey bits of paint or anything. Use wire brush for hard to reach places.
3.) POR15 cleaner / degreaser. Self explanatory, I also worked it in with a sponge and rinsed it off big time.
4.) POR15 Metal Prep. They explain this as a rust neutralizer / etching compound. What you do is spray it on the bits to be painted and keep it wet for a duration of time, keep it MOIST, then rinse it off and let it dry. This leaves the surface with better adhesion and a zinc phosphate coating to improve bonding.
5.) dry, big time dry everything. They say POR15 actually hardens when introduced to water, but I went over the whole thing with an air compressor and gave it heaps of time to sit.
6.) two light coats of por15 classic. Satisfying, but each coat was taking me approximately 2.5 hours to brush on.
7.) two light coats of top coat (chassis black).
In all, this took a couple days, I even woke up one day at 7 AM to do the second coat of POR15, after finishing the first coat at 2AM. The first coat was ready to paint (when dry to touch) after 5 hours. The second coat was ready after 6 hours, same as the third coat. In total, between prepping and painting this was probably 20 hours of work excluding all the drying time.
Following the second coat of POR15 (glossy)

(side note, you can see here the 1" body lift from factory for the auto trans units)
Finished product


To finish it off I am either going to go to a Krown dealer and have them spray inside the frame rails really well right away before any mud or dirt gets in there, then probably krown the whole bottom before winter.


