My take on how to install the SPT Boost Gauge.
Might be simple to some, but it's the first one I did, and it's the first (on WSC) that I've seen on an 08.
The official Subaru instructions that come with it, are here:
http://techinfo.subaru.com/html/downloadFree.jsp?doc_id=270503I changed my task order to suit my needs for the install, but I'll write it here in the smarter order, now that I know how it all works.
I also swapped the gauge to the left side of the cluster, instead of the right side. Right side is where Subaru tells you to put it.
Note: Click any pic for a bigger version.
Tools needed:
As per the install guide
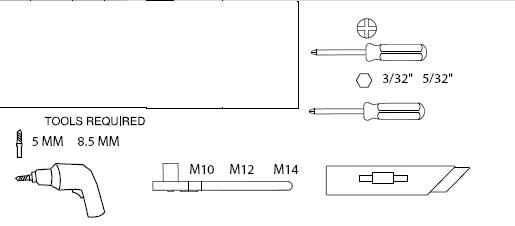
Subaru fail on the metric drill bits. FYI, those are 3/16 (5mm) and 11/32 (8.5mm) size bits required.
I also used various flathead screwdrivers for various parts, a wire coathanger to fish the tube through the firewall, and 10mm and 12mm sockets to remove the TMIC, some ingenuity to figure out exactly how to get something done when Subaru's instructions are SO helpful (like "Route hose through firewall". Thanks for being so specific), and some brute force, even in those locations where you're scared to break something.
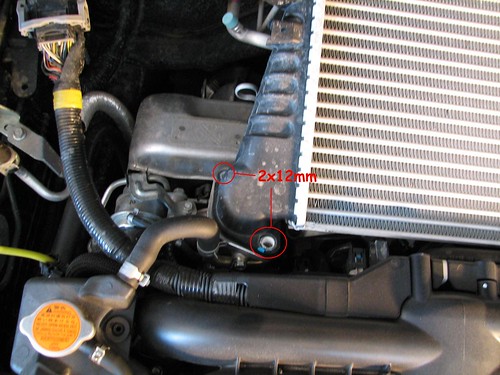
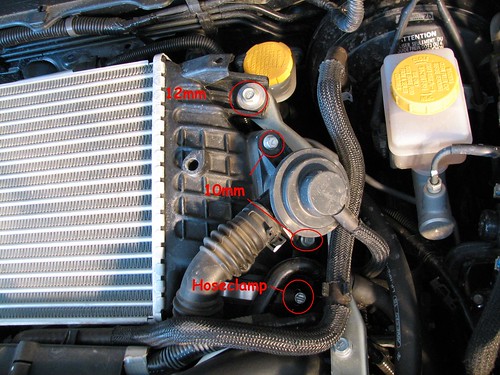
Remove TMIC.
3x 12mm nuts on the IC (2 on passenger side, 1 on driver side), and 2x 10mm nuts on the BPV.
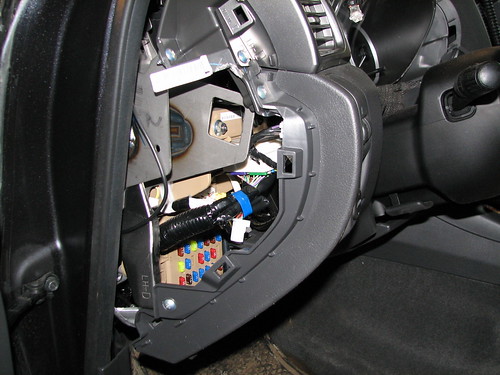
Locate the grommet on the driver side of the dog bone, and remove it.
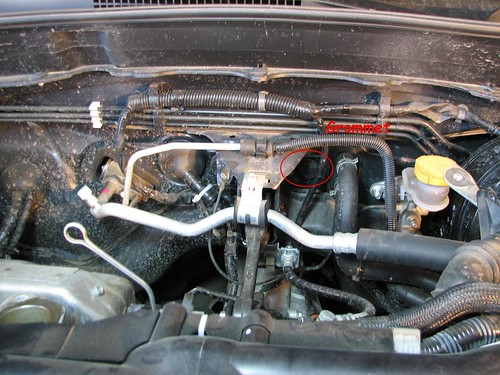
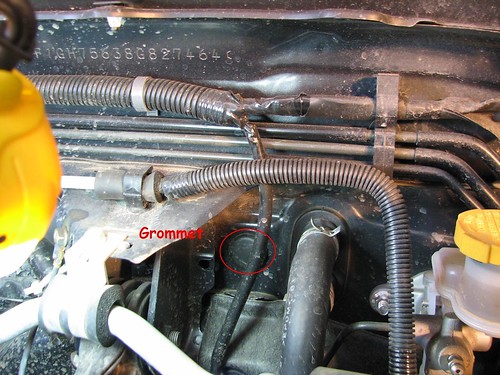
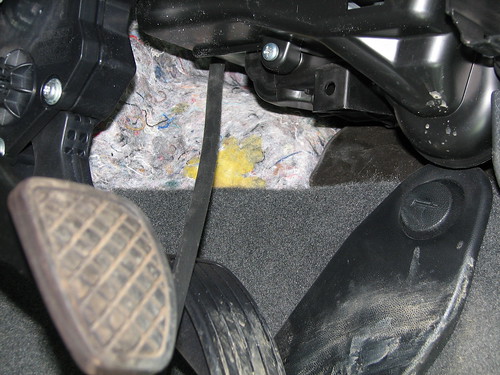
This is where you will fish the tube through the firewall. I would recommend using a wire coat hanger. I actually fished the wire through first, then used electrical tape to attach the hose to the end of the wire, and pulled it back through to the engine bay. It's much easier to push a thin wire through than a rubber sticky hose. I had to bend the wire in multiple directions, and aim it down towards the drivers footwell. Impossible to take pics, but it should come through down by the pedals if you aim it right.
This is after I pulled the hose through, but you get the idea.
At this point, you could attach the hose to the BPV, but I did this later on, so those instructions are further down.
Once you get it into the car, pull it through, leaving enough in the engine bay to get from the firewall, routing around to the BPV.
Into the car.
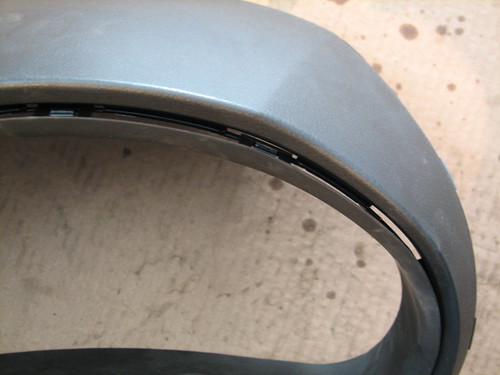
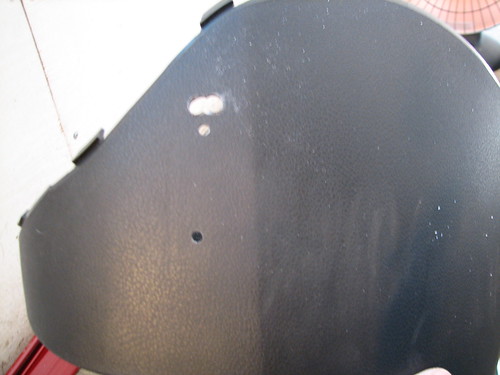
Start by pulling off the cluster hood. I use 303 on my dash, so it was extremely slippery. I couldn't get a good enough grip to pull it out. So, I had to resort to other methods.
There is a sort of "liner" on the inside of the hood. If you squish your fingers between the cluster window and this liner, you can sneak your fingers behind it to give you something to grab hold of.
BE CAREFUL... this liner is screwed to the bottom of the hood. The liner WILL unclip from the hood, and if you pull too hard, you could break it.
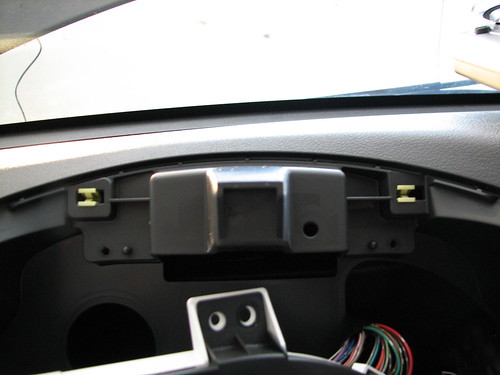
Here, you can see what I mean by "liner":
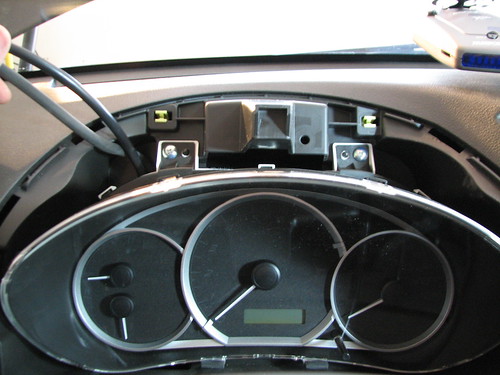
Here, look at the white clips on the top. This is how the hood is clipped to the dash. No worries of breaking anything. So if you can get a good hold of the hood, just pull it out.
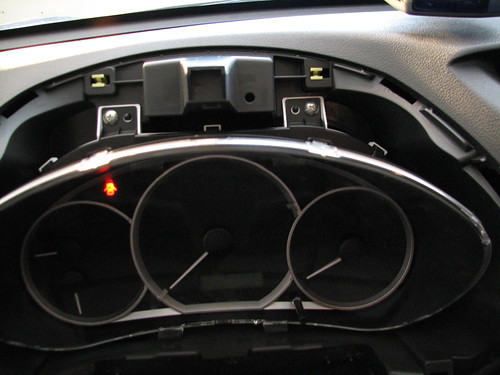
Remove cluster. 2 screws at the top of the cluster. It simply pulls out. Remove the wiring harness that goes into it.
Now, use the wire hanger and fish down to the pedals. Attach the hose to the wire, and pull it back up to the cluster. Try to avoid anything in the way, don't get it wrapped around everything. There is not a lot of excess length on the hose, so don't waste it by wrapping it around the gas pedal.

Pull it up and through the left hole in the cluster (if you are placing the gauge on the left side)
Remove the center trim around the stereo and vents. It is clipped in. I took a very thin flathead, wrapped it in paper towel so it would scratch, and used it to separate the first couple clips at the top.
(borrowed image from Denato1 on 3gwrx)
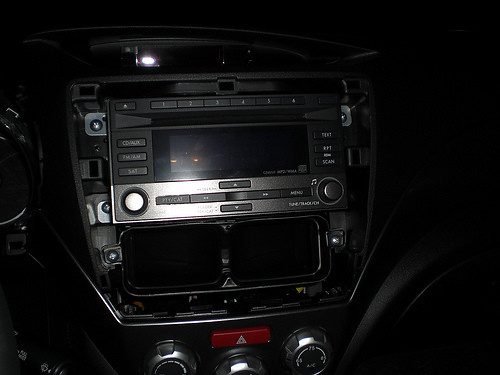
4 screws hold the head unit in, and an additional 2 screws hold the satellite receiver in. Unplug all the wires on the back of the HU, and toss it aside. (or, gently place it somewhere safe, if you're that kind of person)
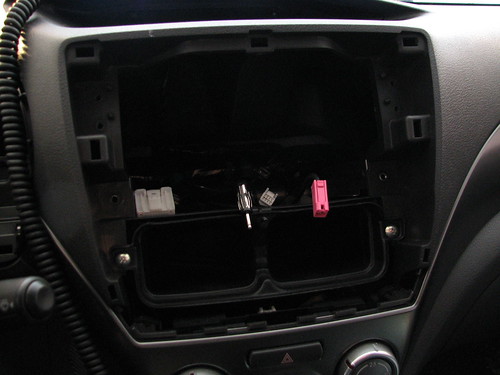
Now you need to remove the clock. Reach under the dash, there are two plastic "pressure" clips on the clock. You need to push them both apart to unclip the clock. Ie. push the left clip left, right clip right... separating them. While doing this, push the clock INTO the dash. It takes some maneuvering.
When unclipped, take the clock out, pull off the wire. Finally, we get to plug in the wiring harness that came with the kit. There are two "T" wires on the harness. They only fit one way. Plug the one that fits into the clock, into the clock. Then take the stock wire, and plug it into the other side of the T.
(borrowed image)
Route the remaining wires through to the cluster (left or right opening, depending on your final location of the gauge)
(borrowed image)

Reassemble the head unit and all its wiring, and replace trim.
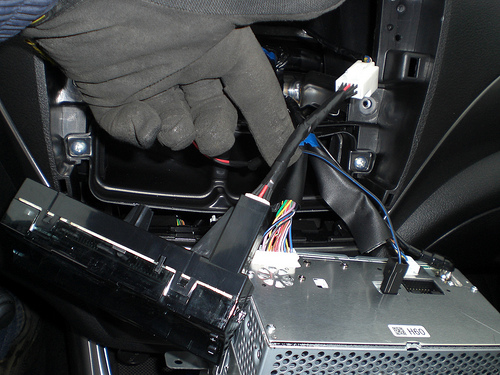
Remove access cover on drivers side of the dash. Route the remaining T from the wiring harness through the dash to the access panel on the driver side.
Unplug the wire to the dimmer control. Plug the T from the wiring harness into the dimmer control, and plug the stock wire into the other side of the T.

Replace access panel.
Now, figure out where you are going to put the gauge on the cluster hood. Use the template included in the instructions, and drill the holes as instructed.
If you are placing the gauge on the left side as I did, cut out the template and reverse it onto the left side (remember, template is printed to be used on the right side.)

Attach the foam and bracket to the cluster hood as per instructions.
Replace the cluster, routing the tube and wiring through the void on either side of the cluster.
On the wiring harness, remove the light from the harness at the butt connectors (as shown in the previous pic with the cluster removed).
Route the light wire from the TOP of the cluster hood, through the larger hole drilled, plug back into harness.
Route tube from bottom of the hood to the top.
(borrowed pic)

Follow instructions to connect tube and light to the gauge.
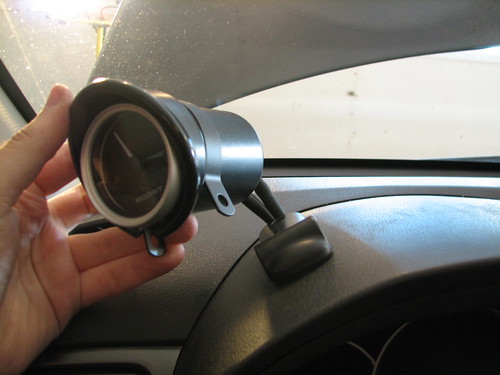
Follow further instructions to attach gauge to the cluster hood.
Gauge is done. Back to the engine bay.
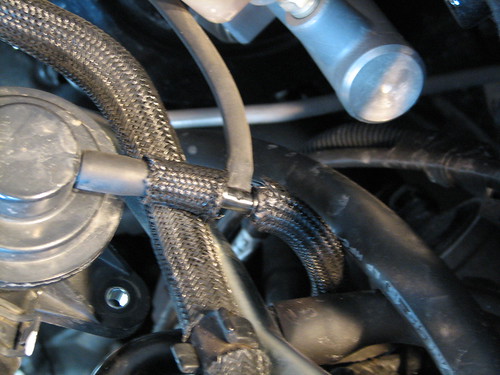
Detach vacuum hose from BPV. If you like, you can go to home depot, and buy a 2" length of tube, so that you don't have to cut your stock one. If you don't care, then...
Cut the tube 2 inches from the end.
Insert the T fitting that came with the kit. Attach the hoses.
Install the TMIC (make sure you haven't lost the rubber gasket between the BPV and IC

)
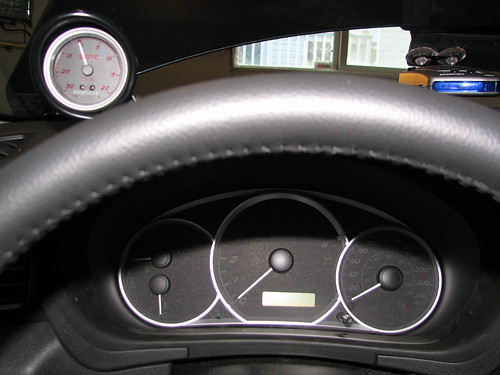
Fin.
Now, you should have this:


