On today's episode of Tools In The Wall, we will be installing a set of Whiteline's KSB751 - "Diff - front support lock kit"
AKA Outrigger bushings.
These rules should apply to the kartboy equivalents whether purchased on their own or as part of TiC's Clunk Killer kit.
This is so easy that I wondered why I should even do a how-to.
However, I didn't really want to do a third "how to change your oil" thread, so this was the alternative.
FYI, these were my reference threads.
http://www.iwsti.com/forums/how-install/52792-kartboy-rear-diff-outrigger-bushings.htmlhttp://www.scoobymods.com/kartboy-rear-diff-cross-member-t5034.html?p=17472Tools:
Breaker bar
17mm socket to fit breaker bar
Tunez (preferably the type that annoys your neighbors. I like to blare old tv theme songs. I prefer The Facts Of Life and Family Matters)
Ratchet
12mm socket
3" extension (not necessary, but made it easier to make full sweeps of the ratchet and the...)
Torque wrench
Jack
Jackstands (not necessary if you don't lift the car)
The bushings
Silicone spray or grease
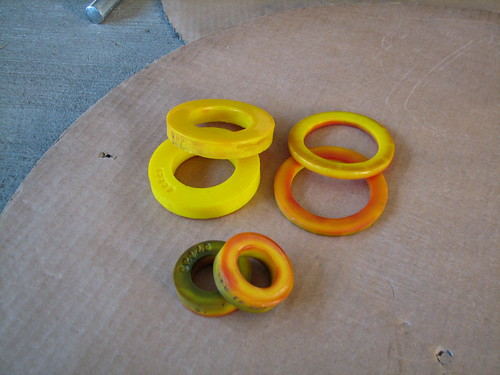
Note on the bushings.
According to those sites above, the 2 bigger thick bushings and the 2 smaller thick bushings are used on the GD.
However, some have used the bigger thin bushings on top to minimize NVH and improve ride comfort.
I have no such requirement for comfort since I only do mods that make the car noisier and/or less comfortable. If both can be accomplished at the same time, money well spent.
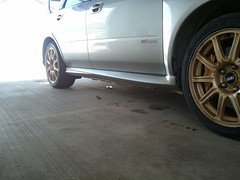
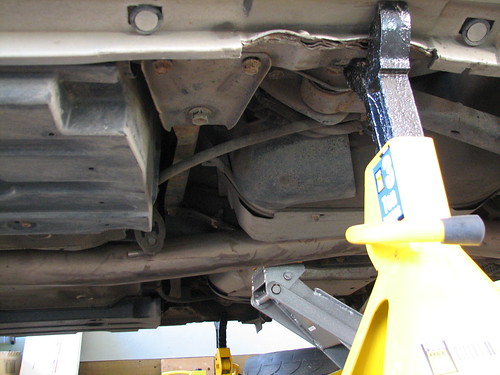
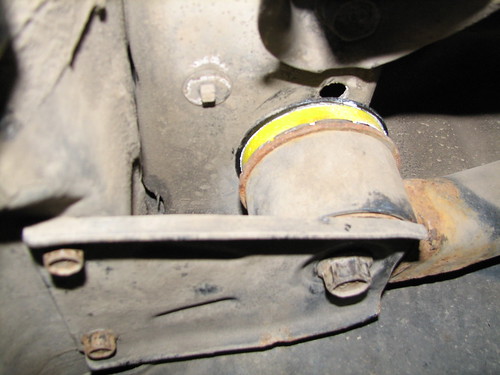
We'll be working in this general area here.
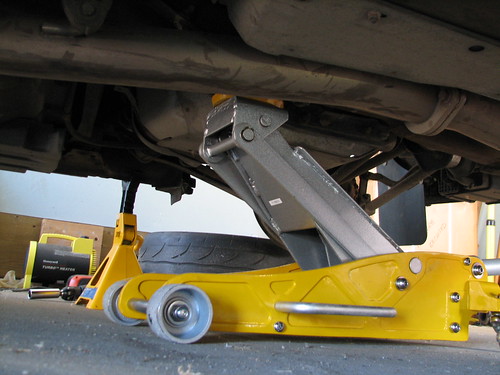
I'm told it is possible to do this mod without raising the car up. Mine happened to already be on stands.
If you don't know how to put your car up on stands, pack up all your tools and give them to me. You won't ever need them again.
Roll the jack under the front of the rear diff, and raise it just enough so that it is supporting the diff.
Use your imagination here. I took the pic at the perfect angle to allow the midpipe to block the entire diff from view.
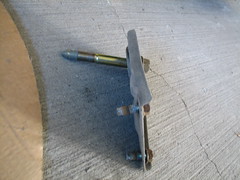
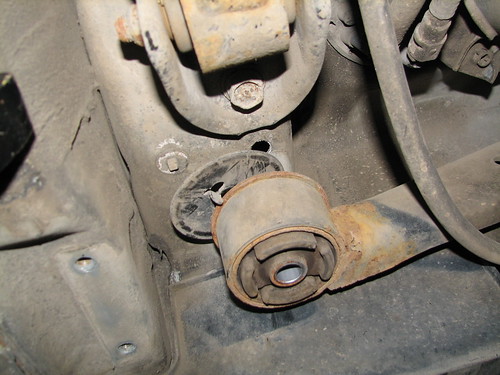
Find this plate on one side of the car. You'll be doing both sides, so be sure to have an argument with your wife over which side to start with.
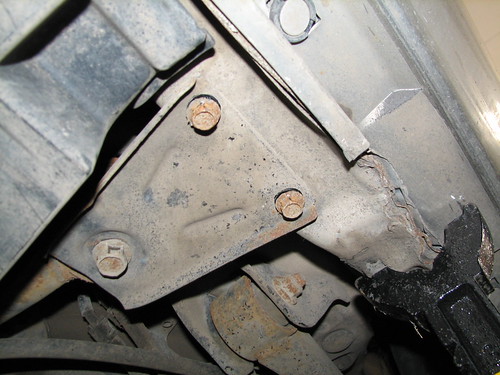
For reference, it's just ahead of where you would place the jackstand, if you use them.
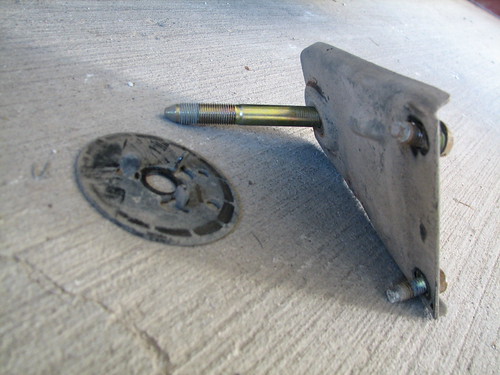
Undo the 3 bolts, 2x 12mm and 1x 17mm. The 12mm should come undone easy. The 17mm might be tight, so use the breaker bar.
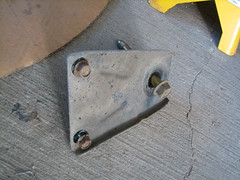
You'll end up with the following.
Here is the exposed diff support bushings.
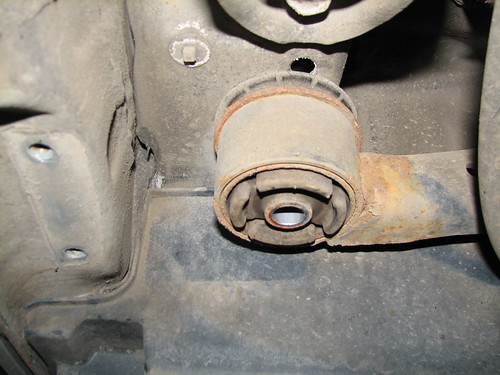
Lower the jack just a bit to allow some room between the support and the body. You'll need enough room to first get the plate out, and then slide the 1/4" bushing in.
Take out the plate.
Here it is dangling.
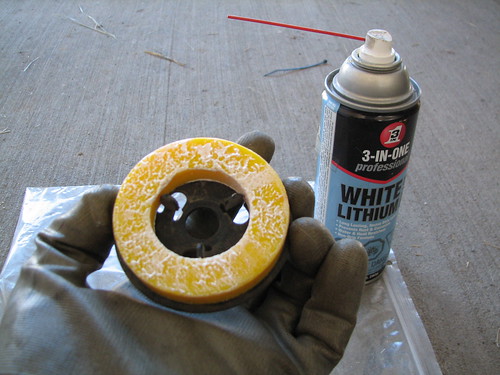
Lube up the large thick bushing and plate it on the plate, centered by the teeth sticking out. This will get reinstalled the same way it came out, with the teeth pointing down.
Slide the bushing/plate combo back on top of the diff support. Depending on how much you let the jack down, you may need to pull down on the support to get enough space to slide it in.
(No pic of this, but you can see it installed further down)
Lube up the small thick bushing.

Press it into the bottom of the diff support bushing.
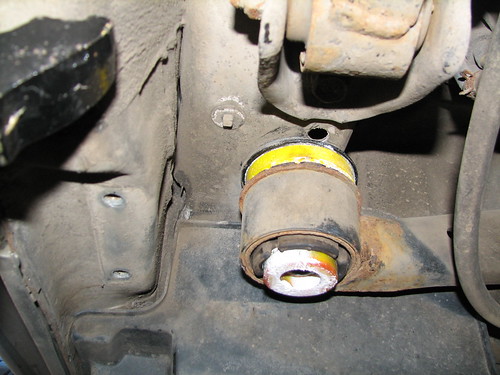
You're pretty much done this side.
Lift the jack back up to press the support up against the body.
The bushings will compress themselves together as you tighten the main 17mm bolt.
If you can't get the 17mm bolt to start threading, just man up and press harder. The bushings need a bit of compression to fit together. If the jack pressure wasn't enough, you'll need to use muscle to get the first few threads done.
Once you have the threads going, you can use the ratchet for the rest.
Thread in the 12mm bolts as well.
FYI, the specs on these bolts are somewhere around 24ft-lb for the 12mm, and 80ft-lb for the 17mm.
Goodntite is plenty.
Repeat on opposite side of car if you're that kind of person that likes to complete a job.


