Author Topic: How To: Install TRS Morimoto Mini H1 HID Retrofit  (Read 5677 times)

0 Members and 1 Guest are viewing this topic.

Offline snackers

  • WSC Pot Stick Posse
  • Rivaling ZZ-TOP
  • *****
  • Posts: 9082
  • More uneven camber than the Westerner lot
  • Location: Deadmonchuk
  • Ride: Bucket of bolts and sadness
How To: Install TRS Morimoto Mini H1 HID Retrofit
« on: July 01, 2012, 09:57:49 pm »
In today's adventures of Fixing That What Ain't Broke, we shall be installing Morimoto Mini H1 HID Projectors into the stock housings of a 2005 Forester XT.

This very long how-to will cover retrofitting headlights from start (removal from vehicle) to finish (aiming of installed projectors)

At the time of this post, the following links worked and these references were used before, during, and after the retrofit process.

Tools and materials used
Various size flathead screwdrivers, long and stubby
Various size philips screwdrivers, long and stubby
10mm socket, 3/8" ratchet, extension
body clip tool
dremel with cutting disk (metal)
Loud music to annoy neighbors
Plastidip (for blacking out headlight housing, optional)
painters tape, newspaper (optional)
TRS retrofit kit, listed above
Butyl windshield sealant (if you didn't order any with your kit, optional)
A second car to make emergency trips to crappy tire (or be a man and drive without headlights)
oven and cookie sheet
Silicone II sealant (if necessary, for shroud)

Of note, all images in this how-to are clickable. If you need it to be bigger for more zoom, click it and find the larger size.

As well, all instructions here are to be duplicated for each side, passenger and driver, unless specified.

Also of further secondary twice removed followup more important note: This post will be constantly modified, tweaked, and adjusted over the next several days as I go into super redonkulous levels over editting and OCD review of wording, spelling, and order of steps. As well, the retarded post char count limit made me post this all SUPER DUPER quick like fast one after another. Retard things such are aforementioned spelling, word order, usage, and twiddleduggery, will be modified as I see fit, right up until I stop doing so.
I may or may not delete the above line when I finish editing.

Offline snackers

  • WSC Pot Stick Posse
  • Rivaling ZZ-TOP
  • *****
  • Posts: 9082
  • More uneven camber than the Westerner lot
  • Location: Deadmonchuk
  • Ride: Bucket of bolts and sadness
Re: How To: Install TRS Morimoto Mini H1 HID Retrofit
« Reply #1 on: July 01, 2012, 09:58:07 pm »
We'll start in this general area here.


There was 3m rockguard on my lights. I wasn't sure how well this would hold up in the oven, so I removed it. It wasn't very clear anymore and needed replacing anyways.

I didn't need to use any special tools. I picked at a corner with my fingernail and it peeled right off, not leavin any goo behind.


I was left with lenses that looked brand spanking new. Maybe I should skip the HIDs as I just solved my crappy light problem?


Of note, I could tell where the 3m was not on the lens.
This is not just dirt.


Now to remove the headlights.

Start by removing the grill.
There are 2 clips on the top that you can use a small flathead to push on while pulling the grill foward.
There are also 2 clips on each side accessible from the top. Same deal, press with flathead. (not pictured)


Remove grill.


Next remove the 2 clips holding the headlight surround.


To remove the headlight surround, push out (towards fender) on the bottom "slider" bit.


Grimace while you push and notice the surround bending in a fashion that makes it look like you'll be spending 100 bucks on new pieces.
It will pop out, don't worry. It's flexible.


There are 2 more sliding clips holding the surround to the headlight. Keep pushing towards the fender and they will pop out.


Finally, the end of the surround has a bit that sticks into the fender. Just pull it, it will pop out.


Now undo the 2 bolts holding the headlight to the rad support. The upper left bolt, and the lower center bolt, 10mm.


Remove the top bolt from above, holding the headlight to the fender.


Now the headlight is loose, but being held in by another one of those "popit" posts.
Just give it a good tug, and it will pop out.
This is what's holding it in. The post right in the middle of the pic goes into the white socket in the fender (left side of pic)


Unclip the 3 corner signal and indicator lights. Also undo the main headlight (not pictured)


You now have a big open hole in your front end.


Do all of the above steps on the other side of the car to match.


YAY MODS!!


Now we'll be working in this general area here.


Before you bring them into the house, you'll need to make some metal shavings. You could do this inside, I suppose, but have fun stepping on metal bits.

Look on the back of the housing. You will see 5 "security" screws.
You can't get these out without a special tool.


OR... pull out your dremel with cutting disk...


Now you can use a flathead screwdriver.

Thus concludes removal of expensive plastic bits.

Offline snackers

  • WSC Pot Stick Posse
  • Rivaling ZZ-TOP
  • *****
  • Posts: 9082
  • More uneven camber than the Westerner lot
  • Location: Deadmonchuk
  • Ride: Bucket of bolts and sadness
Re: How To: Install TRS Morimoto Mini H1 HID Retrofit
« Reply #2 on: July 01, 2012, 09:58:24 pm »
Somehow, these smaller bits are supposed to get inside of the bigger bits?


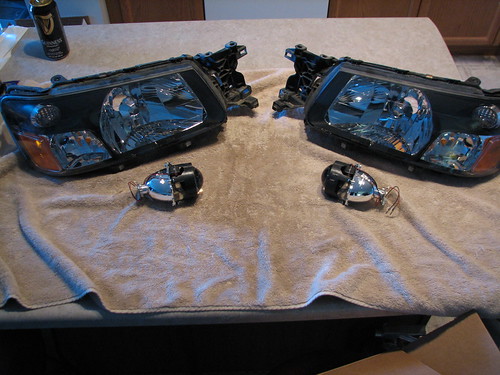
Before baking the lights to separate the lens and housing, we need to remove some bits.

First, the 2 clips on the top.
Use a flathead and pop them off.


Then remove the 5 screws that you previously dremel'ded. (You did that step, right? RIGHT? Curse now if not.)
(no pics of this step. Cry if you need to.)

Preheat oven to 200F-220F.
PREHEAT! It's called preheat for a reason. Make sure the oven is fully up to temp before proceeding.


Put assembly on a cookie sheet, and move your rack so that it's as far away from the heating element as possible, while still allowing the headlight to fit.
Put headlight in oven. (Not something I regularly say. You're allowed to giggle here.)


(ok, stop giggling. Seriously, we're trying to work here.)
Turn on timer for FOUR MINUTES, and start it as soon as you close the door.
Seriously. I am not responsible for you burning your house down because you couldn't be bothered to put your phone down for 4 minutes.
Bookface can check itself for 4 minutes, it's not going anywhere.

(No pics now while I did work)
Pull the headlights out of the oven (with mitts if you want to be a panzy about it)
I only needed ONE flathead screwdriver.
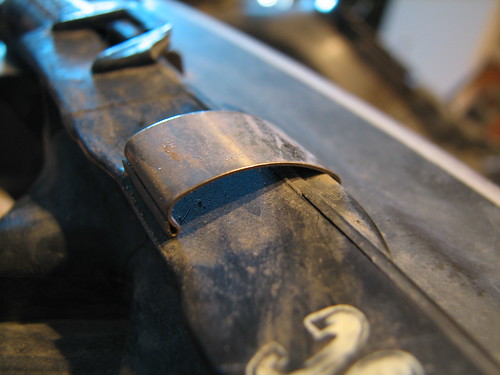
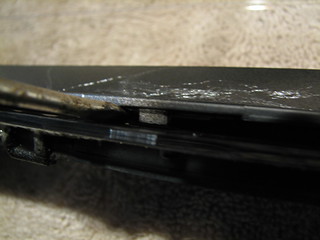
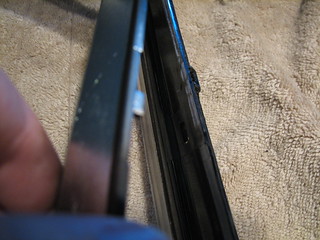
There are clips all around the housing.
Lift one with the screwdriver and pull the lens and housing apart.
Keep it apart with your finger (or use another screwdriver to wedge it apart) and move on to the next clip.
Go all the way around until you have the lens and housing separate.

It's scary (the first time you do it) when you're just reading these words, but it's really easy.
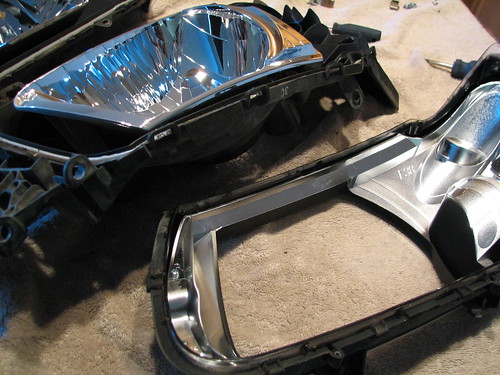
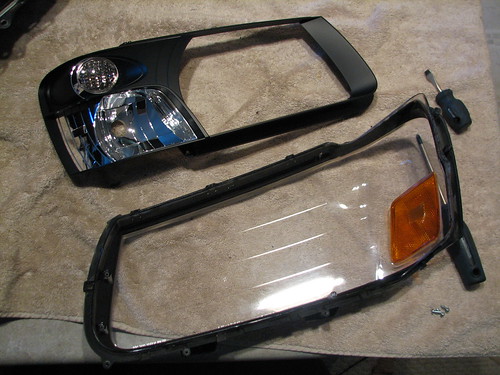
When you're done both headlights (do one at a time, silly) you'll have a pile of bits thusly.


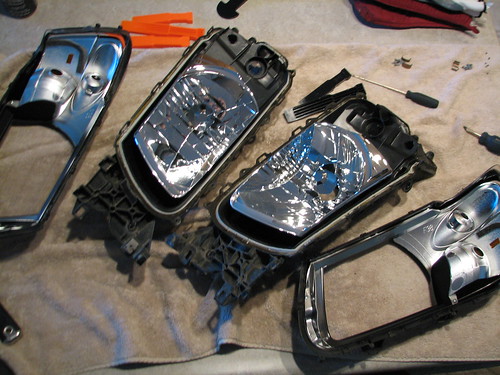
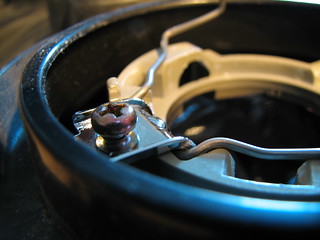
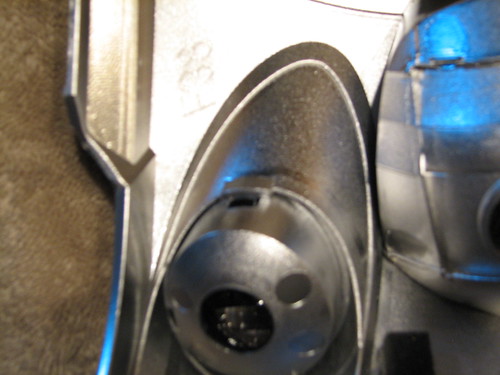
Now remove the halogen... uh... reflector... uh... sticky outy doomajiger.
Flip the housing over, and undo the 1 philips screw holding the doomajiger and the bulb clip.
Save these bits. You may need them later if you choose to use them.


If you are not blacking out the shiny chrome reflector bits, then the next little bit will be boring to you.
Come back when we get to the projector junk.

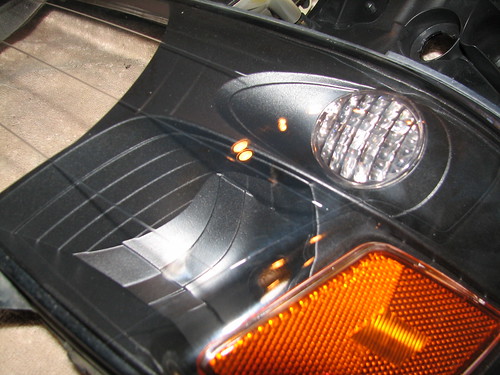
The first bit I blacked out was on the lens surround, the chrome for the signal light.
If you are leaving the signal reflector in place, then skip this bit.

There are 3 screws holding the lens surround to the lens itself.
Remove screws. 2 on the left, one on the bottom.


The top of the surround has a little tab sticking into the lens.
Stick a screwdriver in there and just twist it. This will separate it enough to pull out the surround.


The surround will pull straight out, with a bit of maneuvering around the 2 screw holes on the side.


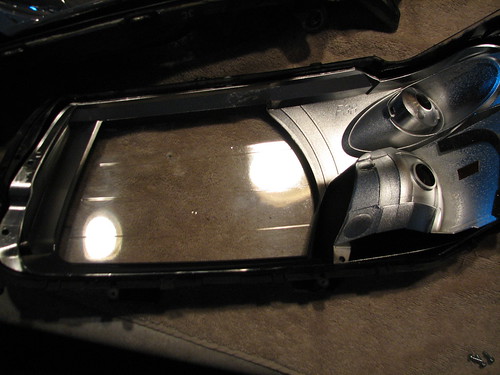
Next, take out the plastic lens for the driving light.
On the back are 2 pressure tabs holding it in place. Only 1 is accessible.
Just push on it with a screwdriver, and push it into the cavity a bit.


Then put a long screwdriver in the access hole and just "pop" the lens out.


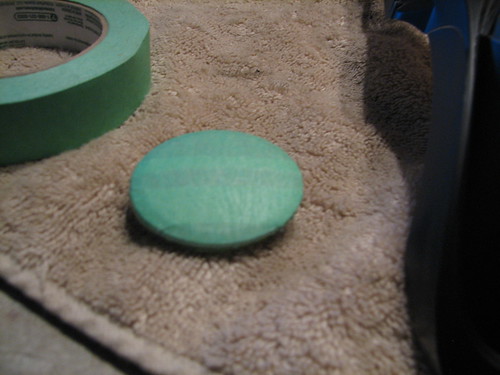
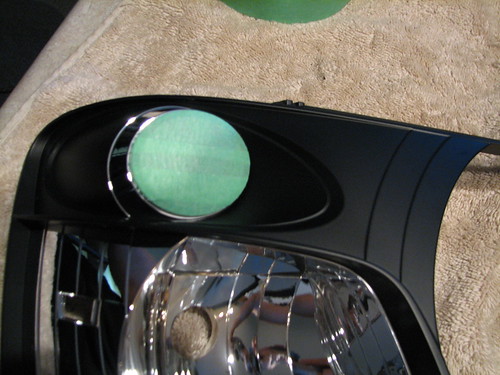
Cover the lens with painters tape.
Be as lazy or OCD as you wish.


Put the lens back on.
The reason you want to cover the lens and put it back on (as opposed to just taking it off and leaving it off for painting) is because the cavity has more of that chrome junk in it for light reflection.
If you want these lights to actually be functional, you want to leave the chrome in place.


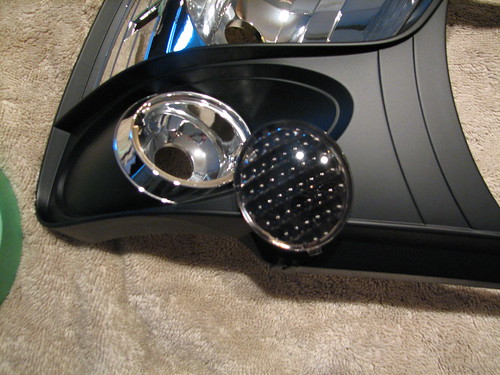
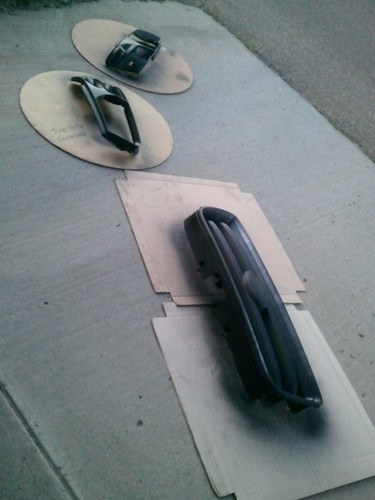
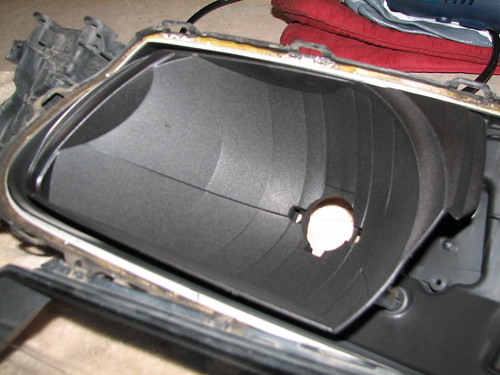
Now for the main reflector dish. (bolded for those that skipped my generous ramblings)

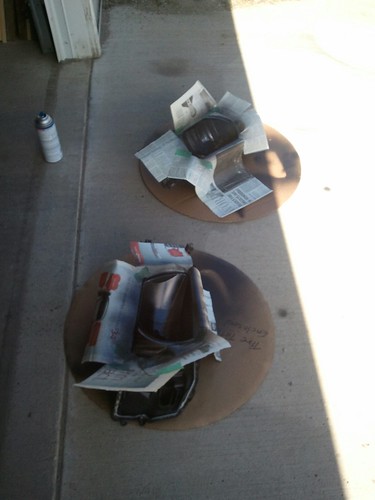
Easy. Use tape and newspaper, and cover up anything that isn't chrome. Pretty straightforward.


Now for paint.
I used plastidip.
You can use paint, but make sure to prep the chrome and plastic for proper paint adhesion. I can't give steps on this since I didn't do it. Follow instructions on can.
Plastidip is just "spray."
Make sure you go at it from 360*. There are lots of weird angles in all of these parts.
I did 4 coats of plastidip.


Here's just the reflector dish dip'ded.


And the lens surround dip'd.


Once all is dry according to specs, you can put the lens surround back in, and tighten it with the screws.
At this point you can put the lens LOOSELY onto the housing and see what you're going to get.


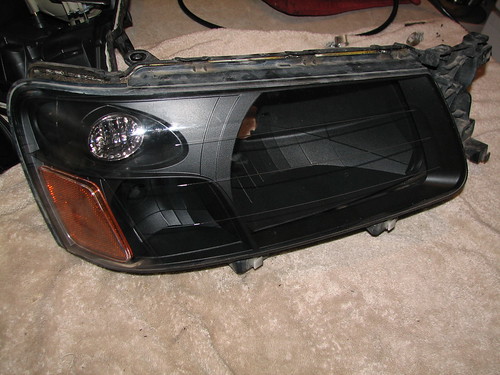
Of note, I left the orange reflector in. Personal preference.
You can remove it if you wish, just note that removing the reflector is illegal.
Modifying the lights in general might be illegal, but the orange reflector is required by DOT. If you need to get the car inspected for any reason, it may not pass if the reflector is missing. /fine print

Thus concludes deshiny-ifying the headlights.

Offline snackers

  • WSC Pot Stick Posse
  • Rivaling ZZ-TOP
  • *****
  • Posts: 9082
  • More uneven camber than the Westerner lot
  • Location: Deadmonchuk
  • Ride: Bucket of bolts and sadness
Re: How To: Install TRS Morimoto Mini H1 HID Retrofit
« Reply #3 on: July 01, 2012, 09:58:42 pm »
Now for projectification installation.

The shrouds I chose were mini graphite. They attach to the projector using a centric ring, pressure, and glue.
...don't get me started on how stupid this is.

Use a few dabs of sealant on the ring, and push it into the shroud, as directed on the TRS instructions.
Put more sealant on the projector and push it into the ring, which is pushed into the shroud, as per TRS instructions.
I'm not going to spend any more time on this, as there are dozens of shrouds and the one I chose is apparently the ONLY one that mounts stupidly like this, with GLUE instead of screws.


Now prepare the projector for install.
Remove the bulb clip mount from the projector by undoing the 3 screws.


Put on the large silicone bushing.


Run the 2 wires for the solenoid through one of the holes on the side of the main bulb hole.
Fit the projector through the bulb hole from the reflector dish side.
Of note, the bixenon bulb has a solenoid dealy on one side of the projector.
This dealy goes on the BOTTOM of the projector when mounted correctly in the housing.
You'll discover that there is only one way to mount it because...

...fit the H4 adapter around the projector threads. The projector has a "tooth" in the threads, and the h4 adapter will only fit one way into the housing. Therefore, it is impossible to mount the projector upside down.
I wish I had known this ahead of time (or looked ahead) and it would have saved me 30 minutes of research. Funny how you can't find steps on how to do something when it can only be done ONE WAY. :P
Now thread on the lock ring. Tighten this down as tight as you can. Finger tight is not good enough, I used some needle nose pliers to grip it and turn.
Note, this ring is cheap-as-hell pot metal. Make sure it threads on without issue (not cross threaded) and don't eff it up with pliers.
Then put on the h1 bulb clip and the 3 screws.

Instructions and order for the above are in the Hardware Guide 1-2 linked at the top of the thread.

You should have this when you're done.


Now comes the Your Choice Special.
If you're paranoid, you can modify that previously removed hoozamagummy so that you can also use the H4 bulb clip as an additional assurance.
All you need is the part that screws into the housing, and the clip itself.

Use your dremel, and cut the jazzamaballer just before the "curve", like so:


Put the clip back in its groove, and screw that bit into the housing. (Pic below, STAY TUNED!!)

Now put the H1 bulb in.
(and here you can also see the H4 clip in position)


Thread the 2 wires from the solenoid through the 2 holes in the grommet.
Do this BEFORE you fit them into the plug. THIS IS WHY I DO HOW-TOS, FOLKS!! Learn from my mistakes.
THEN put the rubber water shield plug hoozywhatsitz on the 2 leads.


THEN put the 2 leads through the 2 remaining holes in the grommet (the one attached to the bulb leads)

THEN put the 2 leads into the 9006 plug.
As for which goes where... I'm not sure if these are polarity sensitive, but I made sure to do it proper anyways.
Find the plug that these will connect to on the harness. (Use the Harness PDF linked at the top of this thread)
Match black to black.


When you're done, you'll have two cyclops.


Bicyclops?

Offline snackers

  • WSC Pot Stick Posse
  • Rivaling ZZ-TOP
  • *****
  • Posts: 9082
  • More uneven camber than the Westerner lot
  • Location: Deadmonchuk
  • Ride: Bucket of bolts and sadness
Re: How To: Install TRS Morimoto Mini H1 HID Retrofit
« Reply #4 on: July 01, 2012, 09:58:57 pm »
Harness mount and wiring.

You want to get the wiring all up and running so that you can test your projectors, bulbs, and solenoids BEFORE you seal up the housing and discover you put a big damn fingerprint on the projector lens.

OUT TO THE CAR, FOLK'LL'S!!

Unroll the harness, and spread it out loosely on the front bumper.
The instructions say that you'll use the stock H4 connector closest to the battery, and the harness H4 input is about 6 inches from the relay box. So, guess which side of the vehicular the relay box is going to have to be mounted?

Keep in mind all my routing was thought of and obsessed about for a good couple hours before deciding on locations.
What you are seeing is the final result.

I found a spot right under the driver's side headlight behind the bumper to mount the relay.
I used some super duper outdoor 3m double sided tape to stick it to the frame.


I ran the passenger side loom behind the bumper beam, zip tied it to the rad support in the middle, and then put the plugs through one of the holes below the headlight.


I found an empty hole on the fender to screw the ballast into, with a nice access hole to the engine bay to run the wires to.


Mirror on the driver's side.


The two looms on the above pic are the positive and ground for the whole system.
Positive was run to the battery, and added on top of all the other addons that have been done (supertones, etc)


Ground was run to the connector right beside the battery, on the fender.
With as often as I remove the battery, I didn't want to have to worry about this stupid thing every time I undo that terminal.
This wire is attached directory to the big (-), so it should be good enough.


Now, plug in the HIDs (don't bother with the signals) and...


HUZZAH!! For I said "let there be ricey blue light"... AND THERE WAS!!


The most important thing is that the lights turned on, and the solenoids for highbeams worked.
Low and high beams were reversed, but that was easily fixed by using the last page of the Harness guide (linked to at the top of this thread) and reversing 2 of the wires on the H4 input plug.

BLUE!!

Offline snackers

  • WSC Pot Stick Posse
  • Rivaling ZZ-TOP
  • *****
  • Posts: 9082
  • More uneven camber than the Westerner lot
  • Location: Deadmonchuk
  • Ride: Bucket of bolts and sadness
Re: How To: Install TRS Morimoto Mini H1 HID Retrofit
« Reply #5 on: July 01, 2012, 09:59:12 pm »
BAKING!!

Get your glue and prep your clamps. Of note, these clamps in the pic are just as useful as a Subaru parts person. Throw them in the garbage.


Apply the glue in short lengths.
Take a short (10cm) piece and squish it flat between your fingers and stretch it out.
Hint: the oils on your fingers make the first attempt at this easy. As the oils wear off, you will get more and more frustrated as the stupid crap sticks to your fingers and makes it impossible to squeeze into nice flat lines.
Use a tiny bit of hand lotion on your fingers. The butyl won't stick.


Start with one end of the piece...


...and work your way to the end.


Keep going all the way around.


You don't want this very thick, or you won't be able to squeeze the lens back into the groove.

As before, preheat oven to 200F.
Put light on cookie sheet, put in oven for FOUR MINUTES. (ZOMG WUT ABOUT DA TWATTERS?!?!)
Work quickly to squeeze the lens back into the groove on the housing.
Squeeze the whole thing as far in as you can. If you have clamps that will work, use them to keep everything together.
If not... well, I didn't use them, and it all worked out for me.
When you get everything as squished together as you can, screw in your dremel'ded slotted'd screws into their holes and put on the 2 clips on top.


Repeat.


YAYZ!

When the assemblies are cool, install back into the car.
Installation is reverse of removal.


(I also plastidipped my grill)

Slide the grommet as close as you can to the bulb.
Slide the rubber cover over all the wires.


Plug it all in.


On the passenger side, I covered up the stock H4 to try and prevent water from getting in and rusting the connectors.


If you are ready to go and don't want to disable DRLs, then skip straight to aiming.

If you want to disable DRLs to save the life of your bulbs...

Undo the 87 gajillion screws holding in the glove box.
(There are also 2 underneath)


Luckily, there's a handy spot to put all these, so that you don't lose them.


The whole contraption will just fall down with a bit of tugging.

Now look for the box that says DRL.


Did you see it?

Look again.


Unplug, put glovebox back in place.

Well aren't you just Mr Awesome McRiceypants?

Offline snackers

  • WSC Pot Stick Posse
  • Rivaling ZZ-TOP
  • *****
  • Posts: 9082
  • More uneven camber than the Westerner lot
  • Location: Deadmonchuk
  • Ride: Bucket of bolts and sadness
Re: How To: Install TRS Morimoto Mini H1 HID Retrofit
« Reply #6 on: July 01, 2012, 09:59:30 pm »
AIMING

http://www.hidplanet.com/forums/showthread.php?10848-HOW-TO-aim-HID-headlights

Yeah.
I just did that.

I might change this post when I aim my own, but I likely won't.

There is a height adjustment knob on the back of the headlight.
Follow the above rules and use the knob.

Fin.

snoozerxt

  • Guest
Re: How To: Install TRS Morimoto Mini H1 HID Retrofit
« Reply #7 on: July 20, 2012, 08:53:10 am »
Awesome write up!

Clear and concise, very detailed.   How did the chocolate chip cookies taste the following day? JK

I agree with you thy plasti dip is the best way to go.  I like how you didn't cover your amber reflector.  A lot of guys I know have gotten in to "ka ka" after deleting.

I'd like to do the same to my front head lights.  Currently I have GE night hawks.  They are a nice white, not overly blue.  No ricey for me. 

Any plans to plasti dip your chrome front grille and lateral grill bars?  Your foz would be a stealth bomber.  When I do my lights (like yours) I will be doing the grille @ the same time.

 It's always a pleasure to see other FXT enthusiasts aspire to show up our rival (and by the thousands) imprezza brothers. Check out my PCV DIY!

Cheers!

Offline snackers

  • WSC Pot Stick Posse
  • Rivaling ZZ-TOP
  • *****
  • Posts: 9082
  • More uneven camber than the Westerner lot
  • Location: Deadmonchuk
  • Ride: Bucket of bolts and sadness
Re: How To: Install TRS Morimoto Mini H1 HID Retrofit
« Reply #8 on: July 20, 2012, 12:15:04 pm »
Any plans to plasti dip your chrome front grille and lateral grill bars?  Your foz would be a stealth bomber.  When I do my lights (like yours) I will be doing the grille @ the same time.
It was done at the same time.
http://www.westernsubaruclub.com/smf/index.php?topic=24850.msg376261#msg376261

Check out my PCV DIY!
I've got a bit of experience with PCV. ;)
http://www.westernsubaruclub.com/smf/index.php?topic=24850.msg374170#msg374170
(I also added your DIY to the big list)

Offline panda-R

  • Stubbly Faced
  • **
  • Posts: 19
  • Location: Calgary, AB
Re: How To: Install TRS Morimoto Mini H1 HID Retrofit
« Reply #9 on: July 21, 2012, 09:03:30 am »
any place in Calgary to buy that sealant? I want to retrofit some lenses into my STi projectors! Thanks in advance!

Offline snackers

  • WSC Pot Stick Posse
  • Rivaling ZZ-TOP
  • *****
  • Posts: 9082
  • More uneven camber than the Westerner lot
  • Location: Deadmonchuk
  • Ride: Bucket of bolts and sadness
Re: How To: Install TRS Morimoto Mini H1 HID Retrofit
« Reply #10 on: July 21, 2012, 10:48:44 am »
any place in Calgary to buy that sealant? I want to retrofit some lenses into my STi projectors! Thanks in advance!
Which sealant? The butyl to reseal the headlight housings?
Any autoglass shop should have it.

Offline panda-R

  • Stubbly Faced
  • **
  • Posts: 19
  • Location: Calgary, AB
Re: How To: Install TRS Morimoto Mini H1 HID Retrofit
« Reply #11 on: July 22, 2012, 11:12:31 am »
Which sealant? The butyl to reseal the headlight housings?
Any autoglass shop should have it.

yup thats the one. I will go and check it out! Thanks!

Offline goodveet

  • Patchy Faced
  • ***
  • Posts: 463
  • Location: Calgary
  • Ride: GC8 WRX STi
Re: How To: Install TRS Morimoto Mini H1 HID Retrofit
« Reply #12 on: January 13, 2013, 03:14:13 pm »
Nice guide, how are they doing 6 months later?

Offline cmyles

  • Rivaling ZZ-TOP
  • *****
  • Posts: 1611
  • Location: Calgary Alberta
  • Ride: 90 Miata
Re: How To: Install TRS Morimoto Mini H1 HID Retrofit
« Reply #13 on: February 11, 2013, 09:49:32 am »
Yeah how did the plasti hold up man?
I'm considering painting, but prepping the "chrome" plastic seems like a PITA

/Chase
Current Vehicles
// 1990 Miata MX-5 || 09 WRX Hatch \\

Past Vehicles:
01 S/TB, 08 Spec.B, 05 Foz, 05 A4, 06 IS350, 05 LGT, 06 2.5i, 07 STi, 04 WRX, 95 GC8, 95 BG5, 94 EJ1