Author Topic: How To: Replace A/C Condenser - GD  (Read 1386 times)

0 Members and 1 Guest are viewing this topic.

Offline snackers

  • WSC Pot Stick Posse
  • Rivaling ZZ-TOP
  • *****
  • Posts: 9082
  • More uneven camber than the Westerner lot
  • Location: Deadmonchuk
  • Ride: Bucket of bolts and sadness
How To: Replace A/C Condenser - GD
« on: March 24, 2012, 03:59:10 pm »
For some reason, you may need to replace your a/c condenser.
This can happen if a) you puncture the damn thing while installing an engine, or b)... well no. There's really only that 1 reason.

Note: Before you do this, have the system discharged by an authorized shop. Releasing r134a into the atmosphere is probably illegal, and is probably a health hazard.
From what I understand, most shops will discharge an a/c system for free.


Tools:
I didn't document these, but all the normals, and nothing extraordinary.
Jack and stands
12mm sockets and wrenches
pliers for various clips
tubing for rad release, if you want
coolant (or reuse what's in there if it doesn't need to be changed)
some other stuff I've forgotten

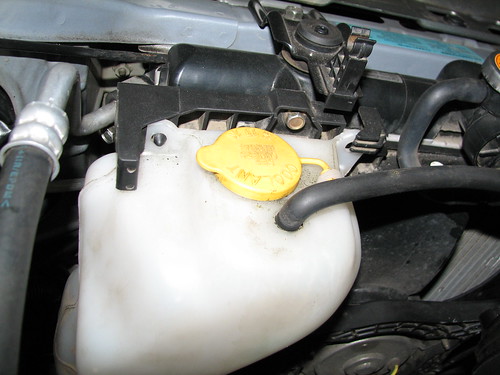
Pop the cap on the upper coolant reservoir.

You can empty the rad in several ways.
Fast method: Just pull the bottom rad hose with a bucket underneath. This is the quickest way, and probably only half messy if you manage to get your arm in the right position to quickly remove it out of the way of flow.

I chose the slow method. Attached a tube to the bottom plug of the rad (passenger side) and open the valve. The hose won't catch it all, but if you go slow enough, the stuff that drips onto the subframe will only come out at 1 point. Place your bucket here, and wait. (maybe 30 mins or more)
Of note, I was able to do this entire process without spilling 1 drop of coolant on the ground.


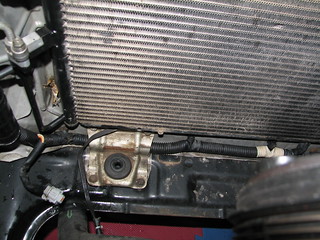
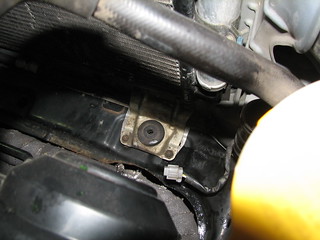
Remove bolts for the 2 brackets that hold the rad in place.
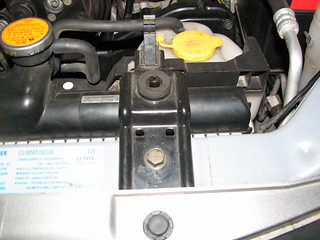


Remove overflow
Take out the hose, and undo the bolt. It will come out once you release the clip.


Take off the 2 smaller hoses on the passenger side.


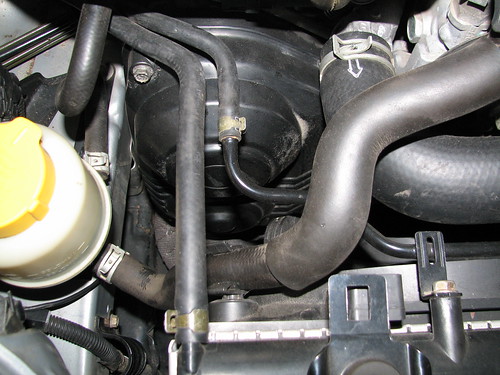
Undo the top and bottom rad hose (only top if you emptied it by undoing the bottom hose)


Undo plugs for rad fans (I don't have a pic of the rad fans in place with the clips)
Grey plugs


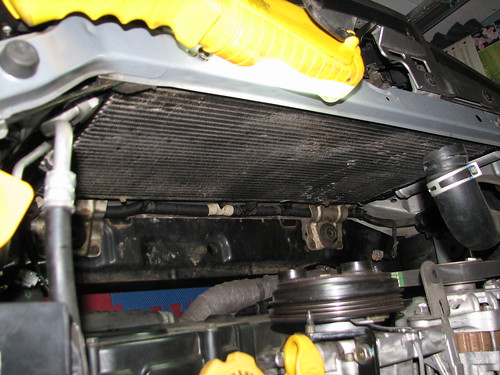
Remove rad. It will just pull out.


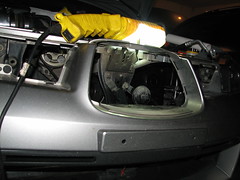
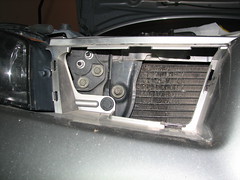
Empty your arsenal of pry weapons on the front grill, get pissed off at breaking tabs that can't be replaced without ordering new grill pieces.
If you don't know how to remove your front grill, hand me your keys.


Undo 2 bolts holding condenser in place.


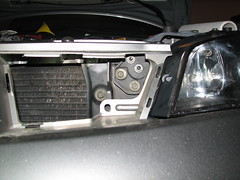
Undo the 2 a/c lines from the condenser.
NOTE: This is assuming you've already accidentally legally discharged the system at an approved shop. ;)
If you haven't, a) you're breaking the law, and b) you're about to get a nice surprise of a/c fluid exploding out of the connector, much like a fire extinguisher, except, you know... unexpected.


Remove the condenser. With the 2 bolts removed and the lines disconnected, it will just pull right out.


Offline snackers

  • WSC Pot Stick Posse
  • Rivaling ZZ-TOP
  • *****
  • Posts: 9082
  • More uneven camber than the Westerner lot
  • Location: Deadmonchuk
  • Ride: Bucket of bolts and sadness
Re: How To: Replace A/C Condenser - GD
« Reply #1 on: March 24, 2012, 03:59:20 pm »
Now that you've disassembled your car to an undriveable state, it's the perfect time to make sure you've got the proper replacement.


Well there's your problem... You've got a flamazinger in your whosidazzle.


What you need to do is smooth out the razamatazz. It makes for more efficient cooling algorithms.


Installation is reverse of removal.
Drop the condenser into the 2 rubber bushings.
Install 2 bolts.
Install 2 connections.
NOTE: Do not overtighten the bolts holding the a/c lines. If you strip these, you'll need a new condenser. They are only there to keep the connections from blowing off. The rubber o-rings will take care of leaks. Just make sure the bolts are tight enough to hold the connectors.


Watch out for freeloaders.


Install all remaining bolts (rad brackets, overflow tank) and connect all hoses (2 on passenger side of rad, bottom hose)
Plug in rad fans (don't forget to do this... interesting times will be had in a timmies drive through if you forget and the line is very slow)

Reinsert go-juice.


Coolant filling techniques vary based on person. This is what I did.
Fill the top rad hose until it's about to make a very big mess, then connect it to the rad.
Then I fill the rad, and place the cap on.
Then I fill the top reservoir. Replace cap.
Start the car, turn HVAC to full heat, and fans on max. Wait for the car to get up to temp. Once the thermostat opens, squeeze the bottom hose a few times every few minutes to squeeze bubbles out. You'll know if the thermostat has opened because the bottom hose will get hot. If it's warm enough out, the fans will start. That's good enough. Stop car. Walk away.
When car is cool, open top cap, fill with more coolant. Then go for a drive.
Wait for car to cool, check upper reservoir and overflow tank. Fill both.
Everything should be good now.
Keep an eye on the levels for the next while, and top up when necessary.

Some people leave the upper res cap off while running the car for the first time, and squeezing bubbles out until the car gets to operating temp.
Fill upper res continuously while bubbles are being squeezed out (this is sort of a 2 man method)
When it won't take any more, go for a drive.

For any method you use, if your car gets heat spikes, you have air in the system.
Squeezing that bottom hose will help remove them.

Get your a/c system recharged at an authorized r134a shop.
Cold air: commence.

Fin.

Offline GrantC

  • WSC Moderator
  • Rivaling ZZ-TOP
  • *
  • Posts: 13908
  • Motorsports is fun.
  • Location: St. Albert
  • Ride: Fender stripes, a high flow cat, yellow high beams, and an exhaust.
Re: How To: Replace A/C Condenser - GD
« Reply #2 on: March 24, 2012, 04:22:57 pm »
...
Of note, I was able to do this entire process without spilling 1 drop of coolant on the ground.


The sarcasm made me actually LOL.

Offline snackers

  • WSC Pot Stick Posse
  • Rivaling ZZ-TOP
  • *****
  • Posts: 9082
  • More uneven camber than the Westerner lot
  • Location: Deadmonchuk
  • Ride: Bucket of bolts and sadness
Re: How To: Replace A/C Condenser - GD
« Reply #3 on: March 24, 2012, 06:05:59 pm »
The sarcasm made me actually LOL.
There was absolutely no sarcasm.
The bucket caught that drip from the subframe.

The hose won't catch it all, but if you go slow enough, the stuff that drips onto the subframe will only come out at 1 point. Place your bucket here, and wait.